
SLA Management
We're now at the part of the guide where we're going to be setting your SLAs! SLAs are "Service Level Agreements" and they are a commitment, either between your agents and their supervisors or the service provider (you) and the client on how long you agree to answer and close an incoming ticket.
It is the never ending process of making sure all the services you provide are being fulfilled and cared for.
We're going to create a SLA that is set based on the priority of a case. The first thing we have to do is navigate to Workflows by going to Configuration > Workflows > New Workflow. Once there, give your workflow a name and navigate to Rules.
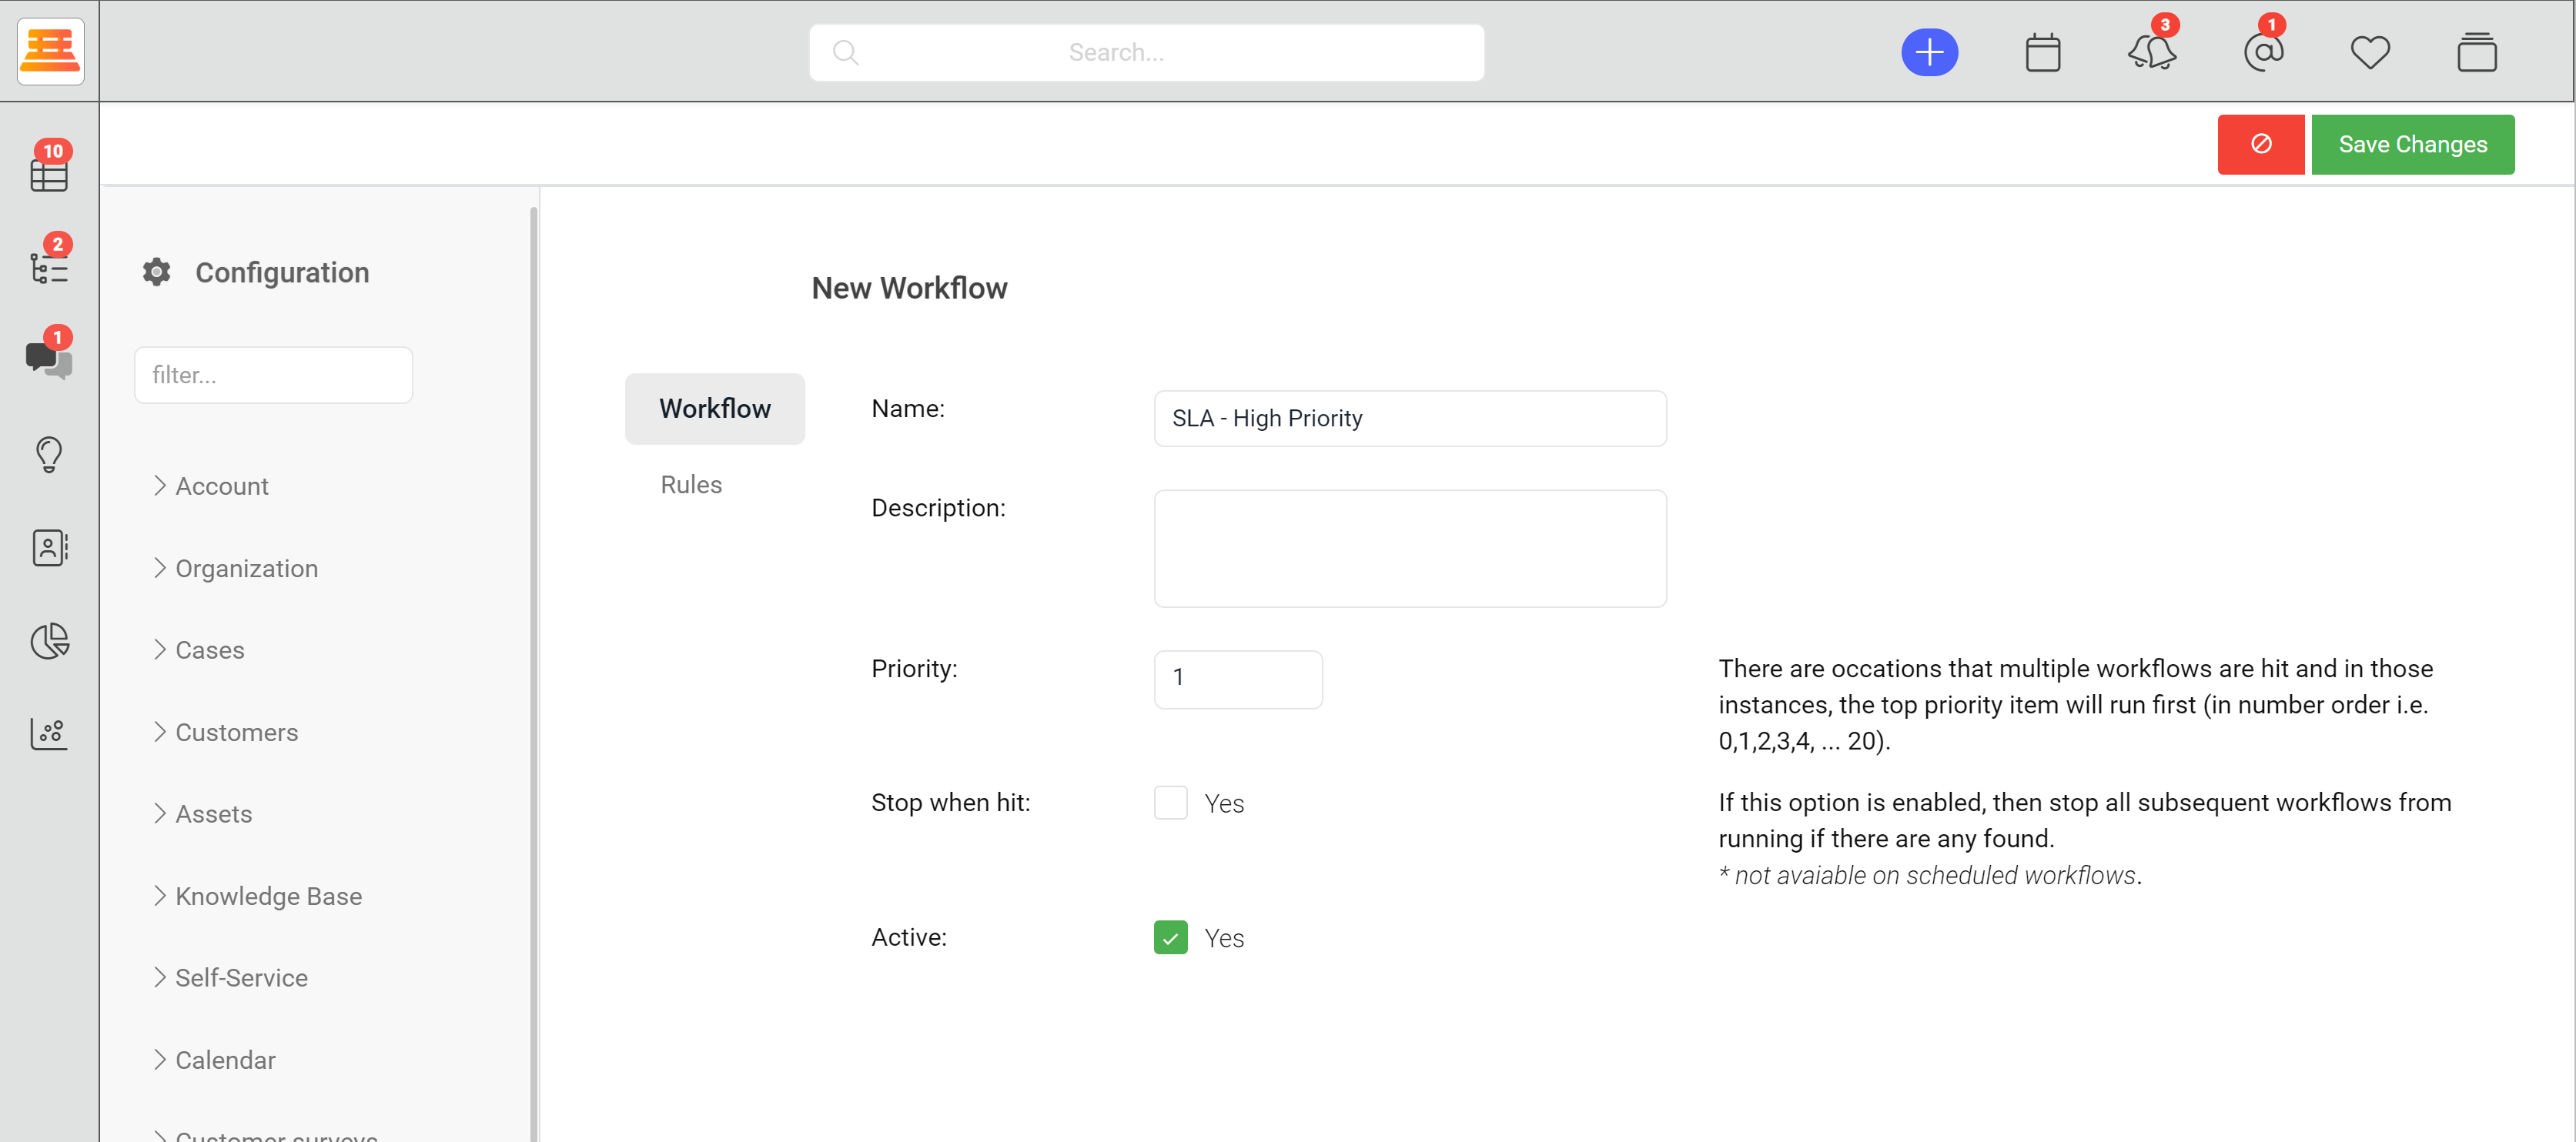
Make sure the Workflow is running on Cases and "On SLA Calculation (Target first response)" ... We're going to make this SLA set for High priority items, so the Target Response time is going to be low - we'll set it to 30 minutes.
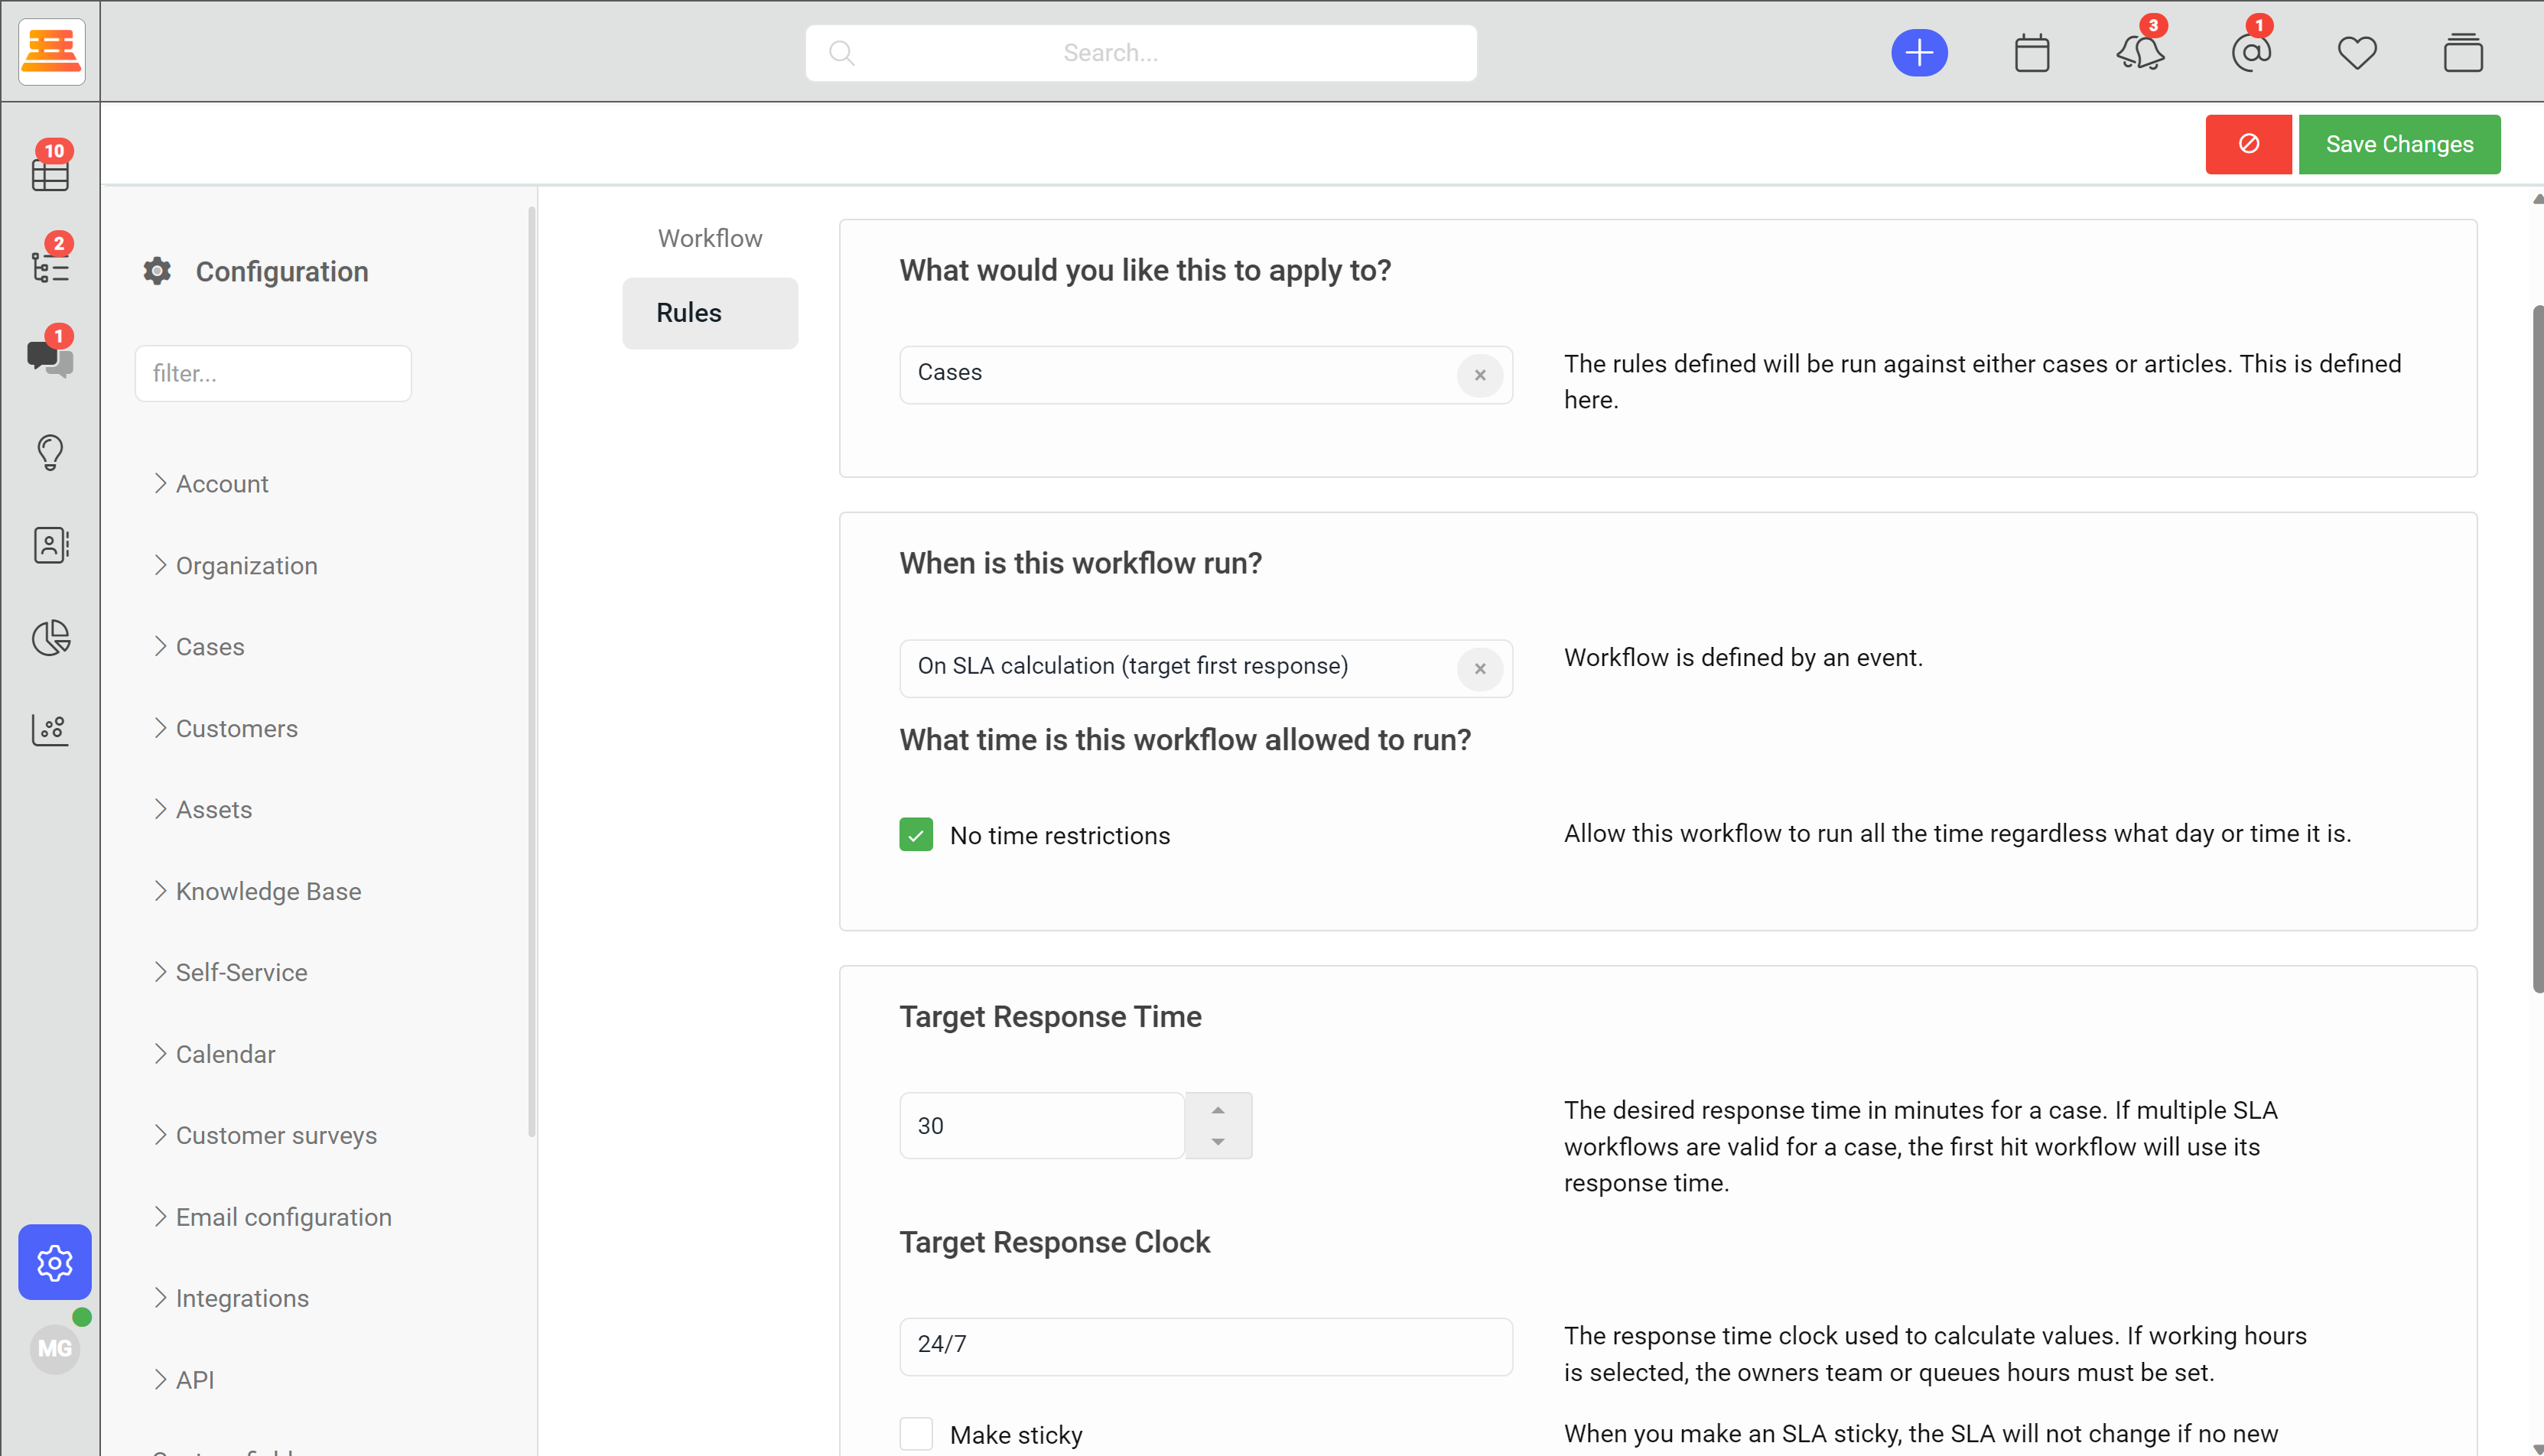
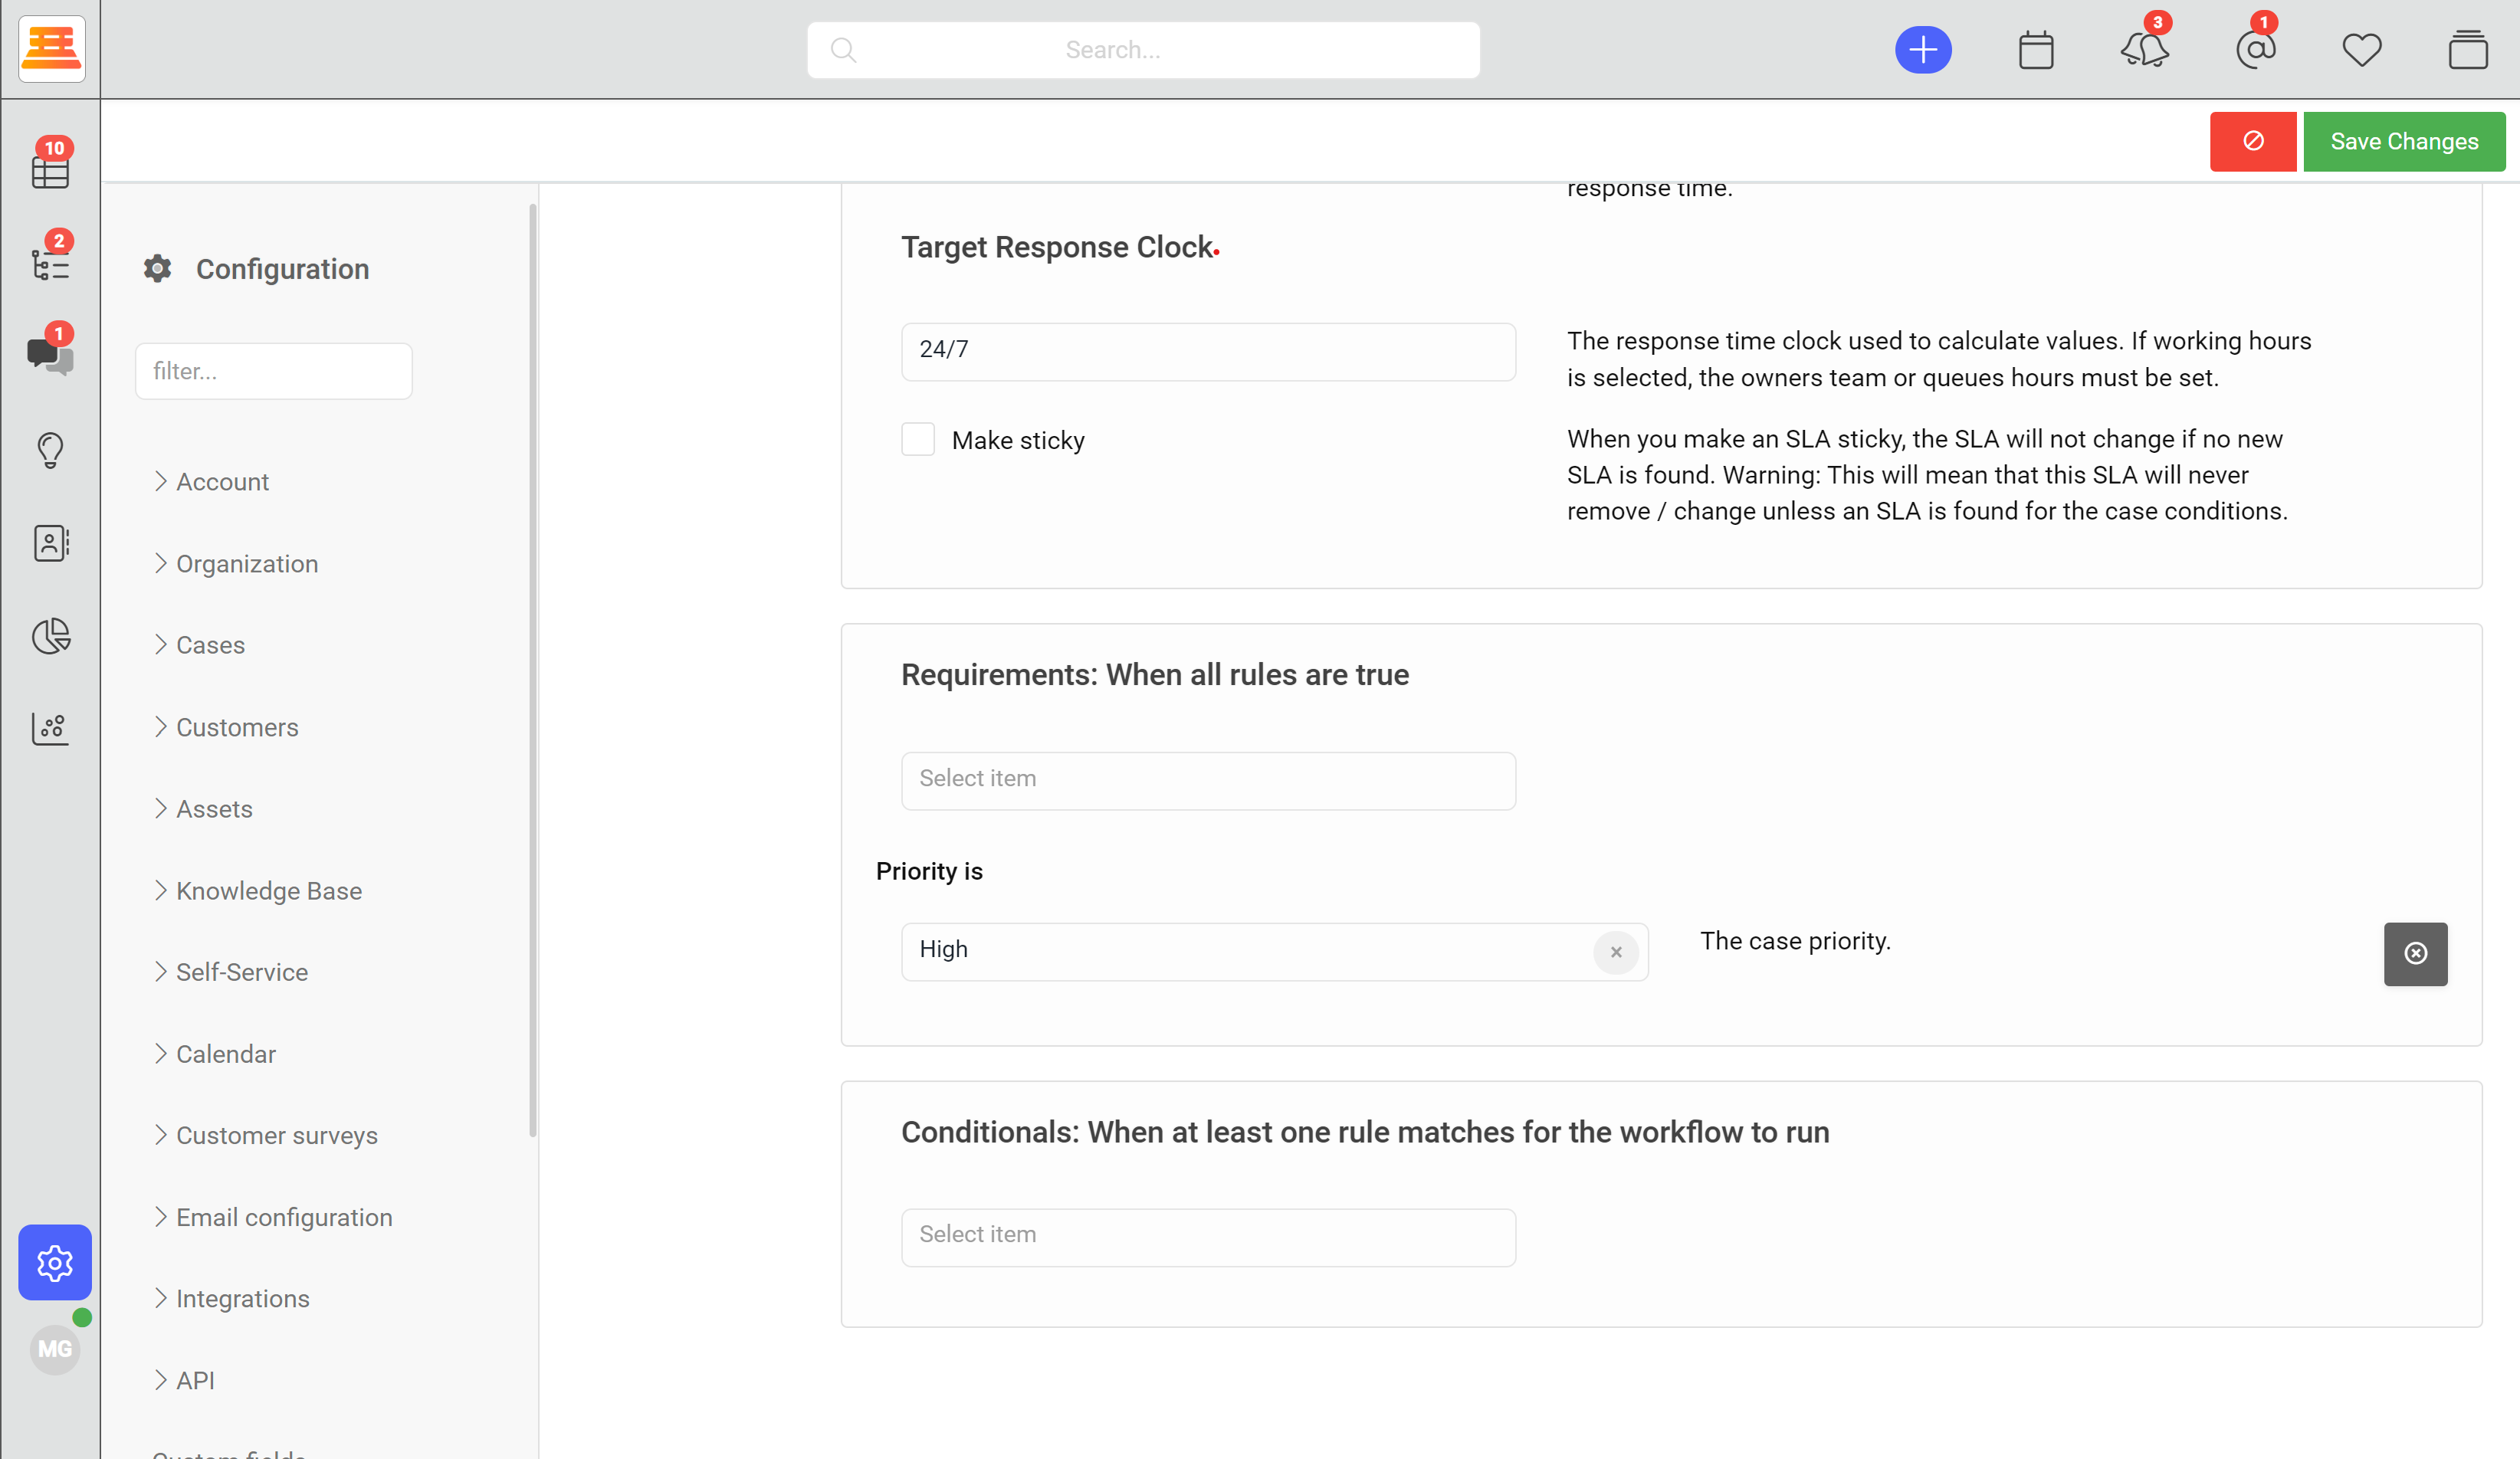
Next, click the "requirements: when are rules are true" dropdown and select "Priority is" and "High."
Then hit Save and your first High priority SLA is set!
To set your SLAs in Supportbench:
- Go to your configuration and navigate to Workflows.
- Click “New Workflow” and give your workflow a name.
- Navigate to rules and select “Cases” under “What would you like this to apply to?”
- On the same page, under “When is this workflow run?” select “On SLA Calculation (target first response)
- Set our desired agent first response time, if this is a high priority SLA select around 30 minutes.
- Select the Requirements: When all rules are true" dropdown and select "Priority is"
- Select "High"
- Save the workflow!
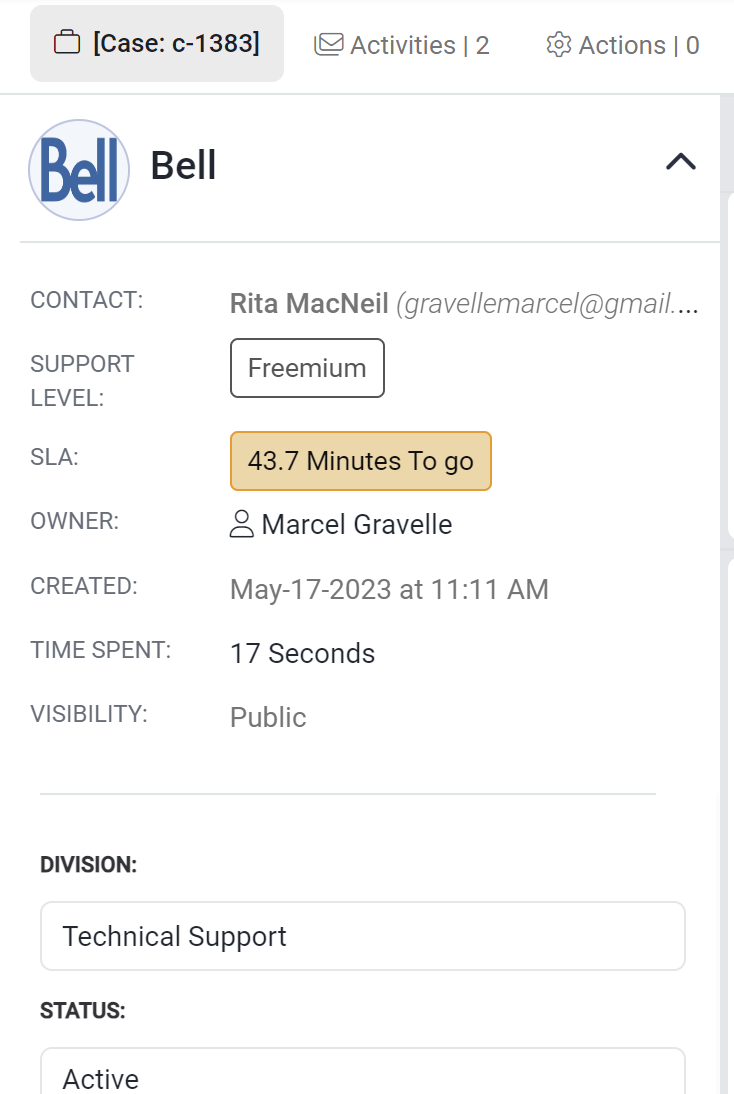
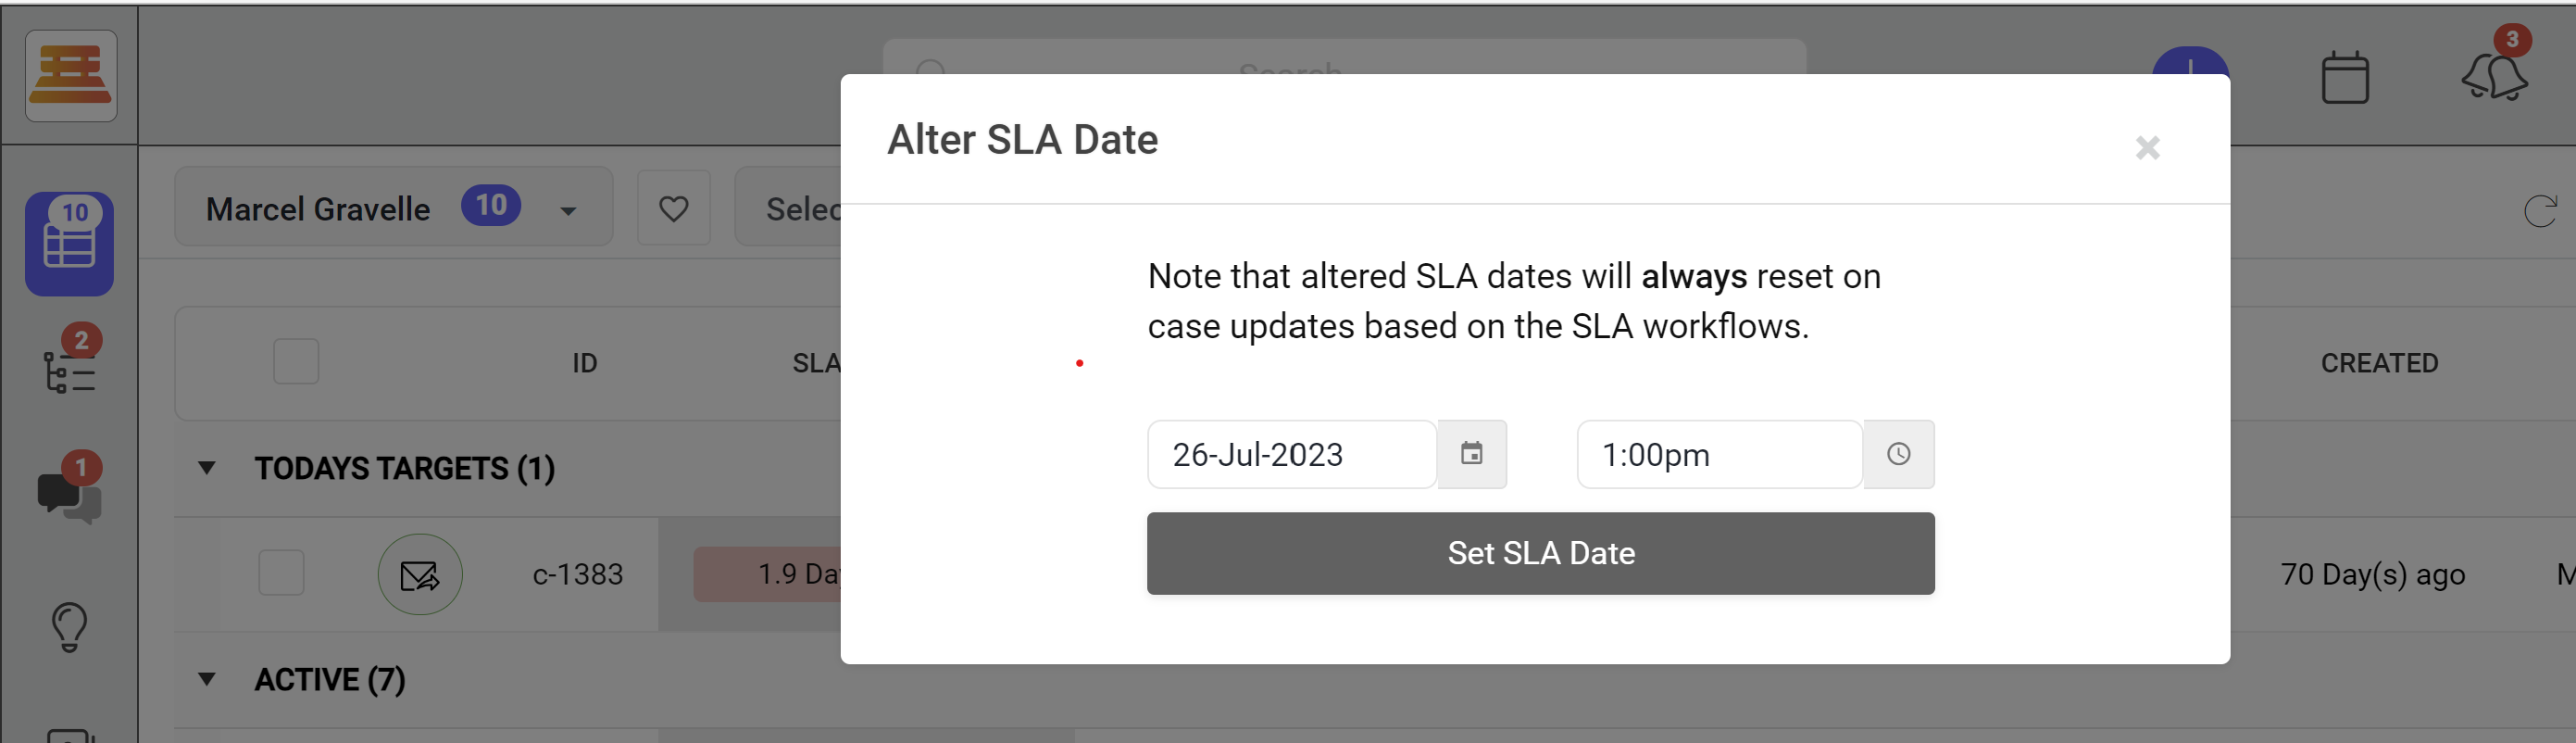
We can also manually adjust SLAs to accommodate things like your client taking sick day, just click into the SLA itself.
Updated about 1 year ago