
Issues
Now, we’re going to go ahead and add our Issues! Supportbench allows you to categorize and classify tickets based on the nature of the customer's problem or request.
By using custom issues, you can streamline your support process and provide targeted assistance to customers.
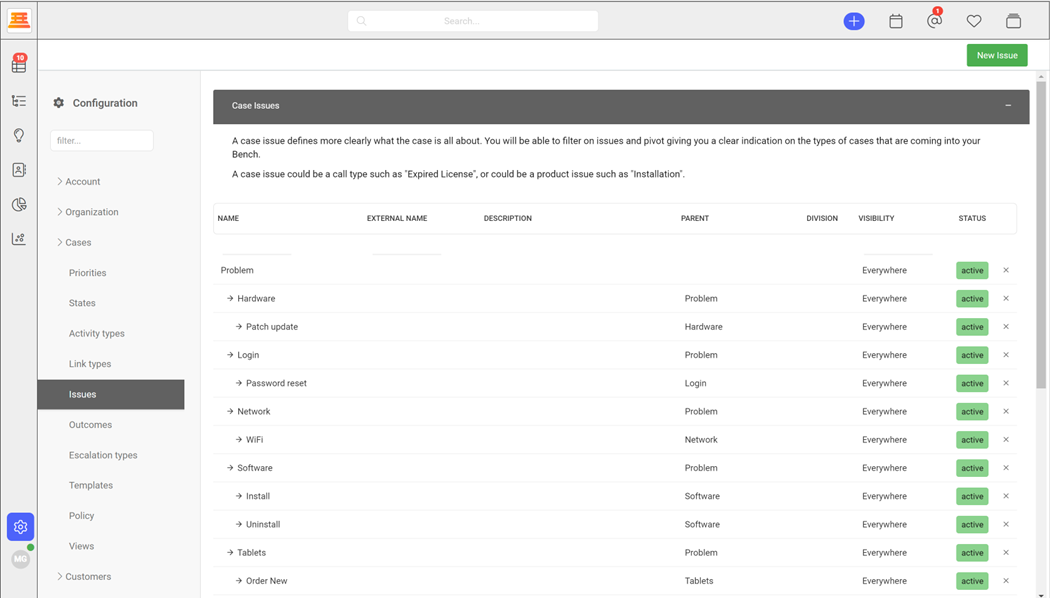
In Supportbench, an issue represents a specific problem or request raised by a customer. It serves as the primary unit of support and allows you to track and manage customer inquiries effectively.
Examples of issues include software bugs, product feature requests, billing inquiries, or general support queries.
Associating Issues with Tickets:
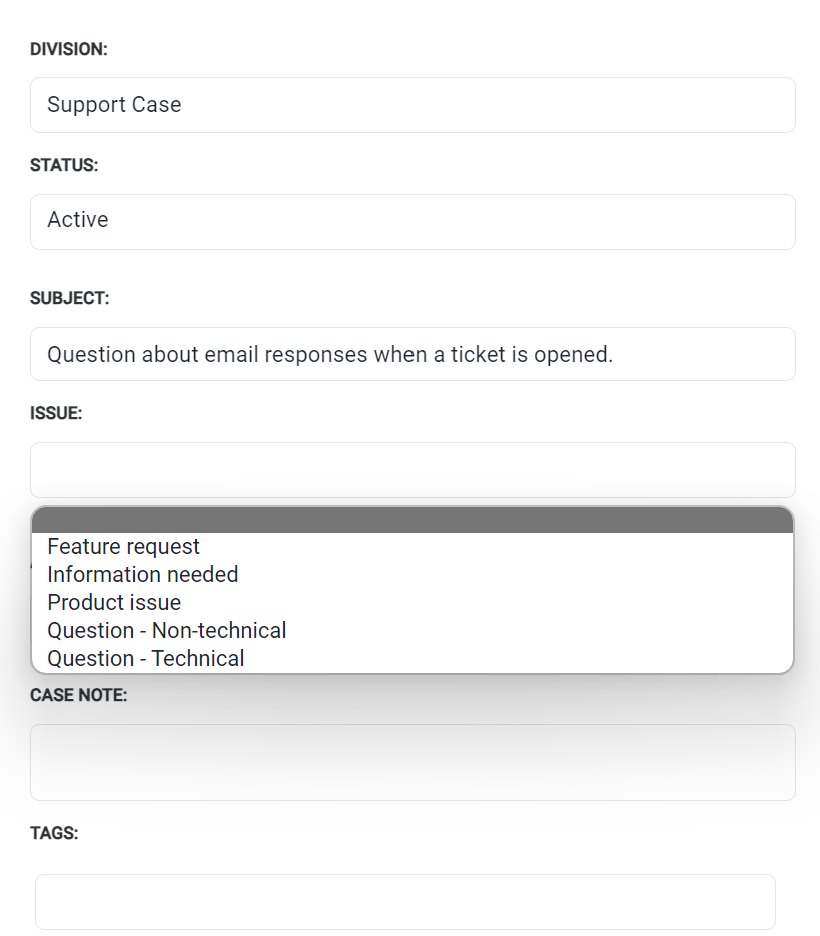
Once you have created issues, you can associate them with tickets to classify and organize customer inquiries. When creating or editing a ticket in Supportbench, you can select the appropriate issue type from a drop-down menu. This allows your support team to identify the nature of the customer's problem or request accurately.
Additionally, you can have supportbench automatically set issues based on certain triggers that you decide upon. More on that in workflows.
Best Practices for Issues:
Consider the following best practices when setting up and managing issue types in Supportbench:
- Keep issues relevant and concise: Define issues that accurately represent the primary categories of customer inquiries without creating excessive granularity.
- Regularly review and update issues: As your product or service evolves, review and update your issue to ensure they remain relevant and reflect customer needs.
- Limit the number of custom issues: While custom issue types provide flexibility, too many custom options can lead to confusion. Strike a balance between standardization and customization.
- Train your support team: Educate your support agents on the proper usage and selection of issues to ensure consistent classification and reporting.
Review:
- Navigate to Configuration > Cases > Issues
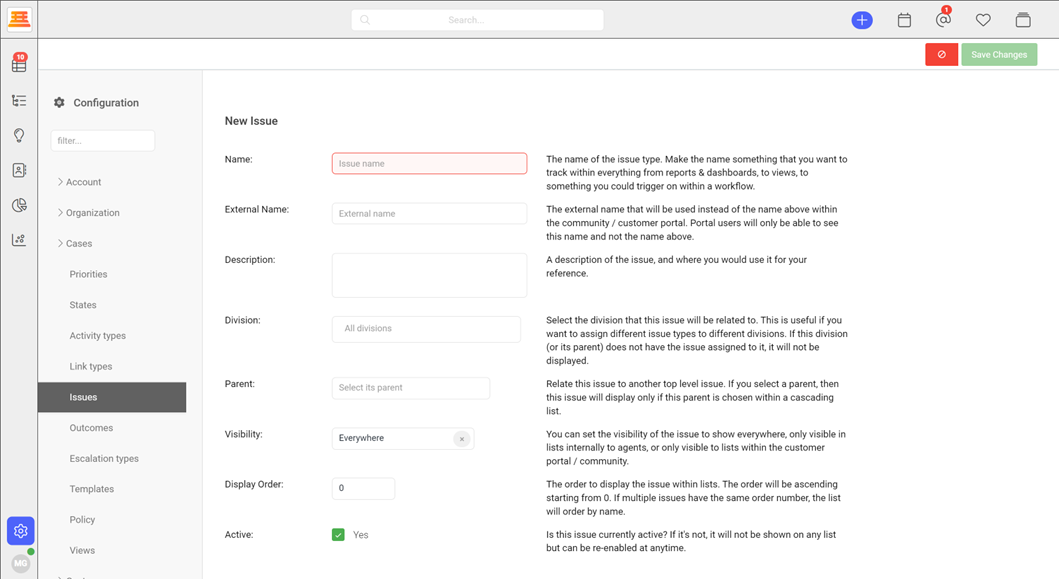
- Click new issue
- Fill out your desired parameters and be sure to lock the issue down by Division if you need to.
- Make sure its active and hit save.
Updated about 1 year ago