

Custom Fields
Add a custom field only when a standard field does not capture information your team needs consistently. A custom field stores a defined value on an entity such as a case, company or contact. A dropdown helps people choose consistent values; a free-text field allows more deta
Optional · Configure case handling
Add a custom field only when a standard field does not capture information your team needs consistently. A custom field stores a defined value on an entity such as a case, company or contact. A dropdown helps people choose consistent values; a free-text field allows more detail but is harder to compare.
Before you begin
Use an administrator with custom-field configuration permission. Decide the question, which record should own the answer and how agents will use it. For Northstar, Export format belongs on the case because Jordan may report different export failures at different times.
Do not create a field for information already captured by Priority, Issue or the customer relationship.
Create the field
- Open Settings → Configuration → Custom Fields.
- Search for an existing field that asks the same question. Reuse it if its location and meaning are correct.
- Select New Field. In Details, enter Export format in Name and Label, add a description such as “Format selected when the report export failed,” and leave Active enabled.
- Open Behavior. Set Location to Case and Type to Dropdown. Review Order and Divisions; a blank Divisions selection makes the field available across divisions.
- Decide where the field should be visible using the case policy below. Do not require an answer until every relevant request can supply it.
- Select Save Changes, reopen the field and verify the saved entity/location and type. The location cannot simply be moved after creation; changing a type does not migrate existing values.
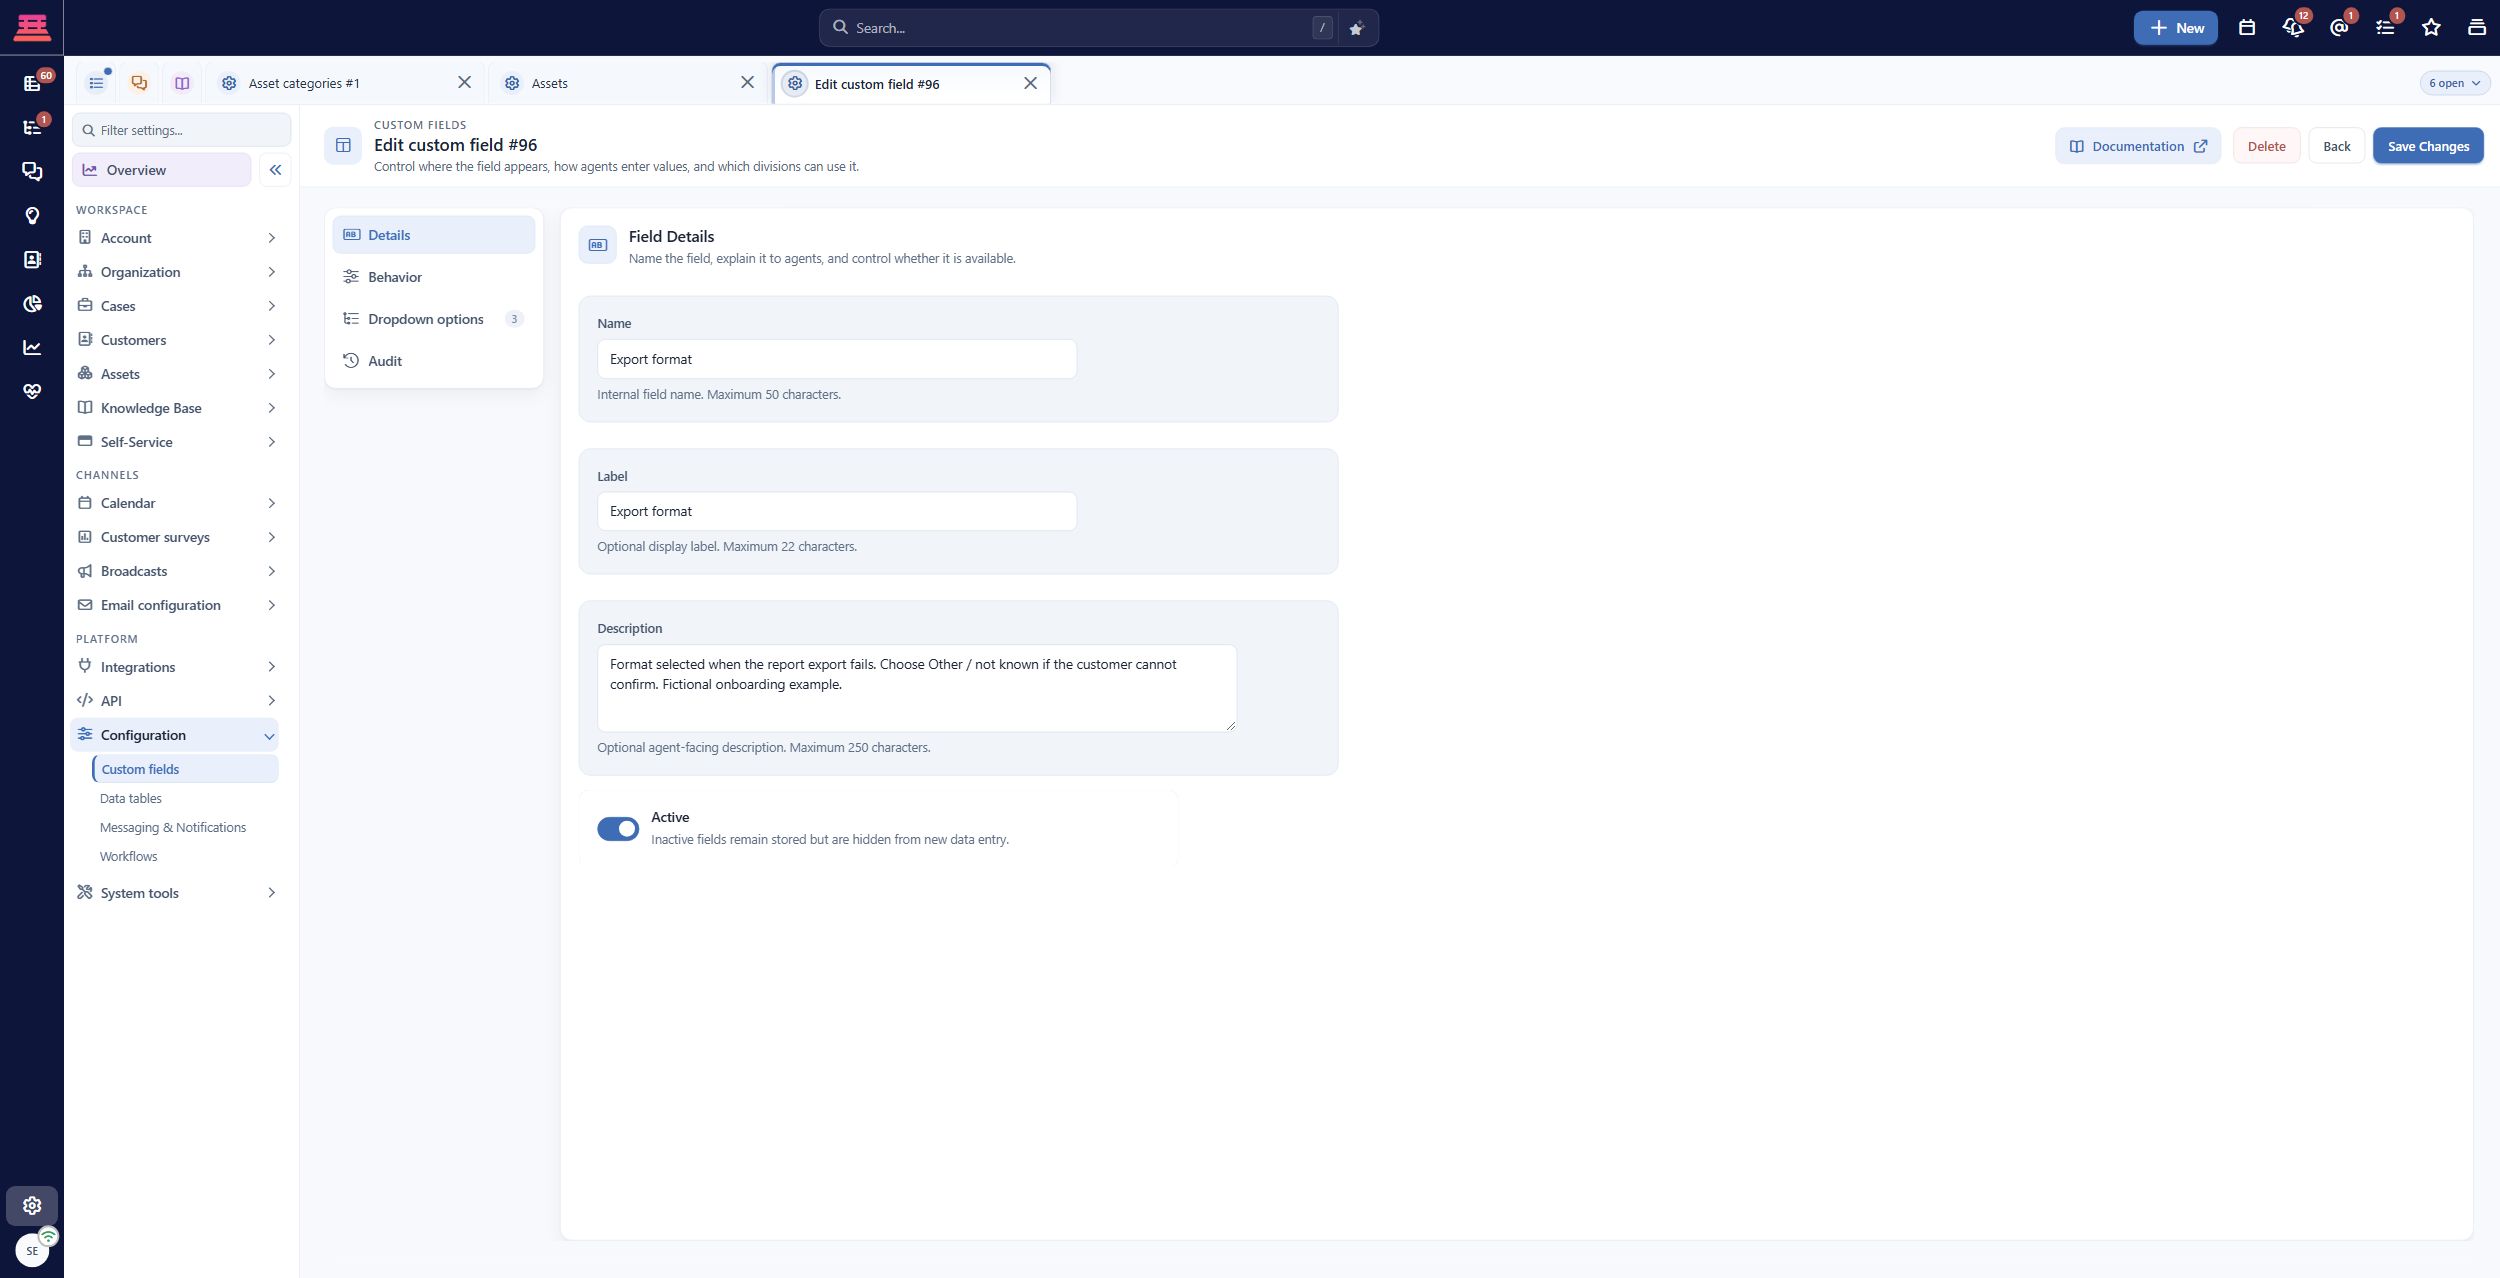
Saved Export format case field with a clear label and instructions for agents.
Populate a dropdown and place it on the form
- Open the saved field’s Dropdown options.
- Use New Item to add the meaningful values, for example CSV, PDF and Other / not known. Save each item using its displayed save action.
- Review the order and active choices. A useful unknown option can prevent customers inventing an answer.
- Open Settings → Cases → Policy, select the relevant case-open policy and add the field under Fields to Show.
- If it must be required for a particular process, also review Required Fields. A required field must be visible on that form.
- Save the policy, reopen the new-case form and choose the division and issue that match it.
- Select CSV on the Harbor example, save the case or draft and reopen it to confirm that the value was retained.
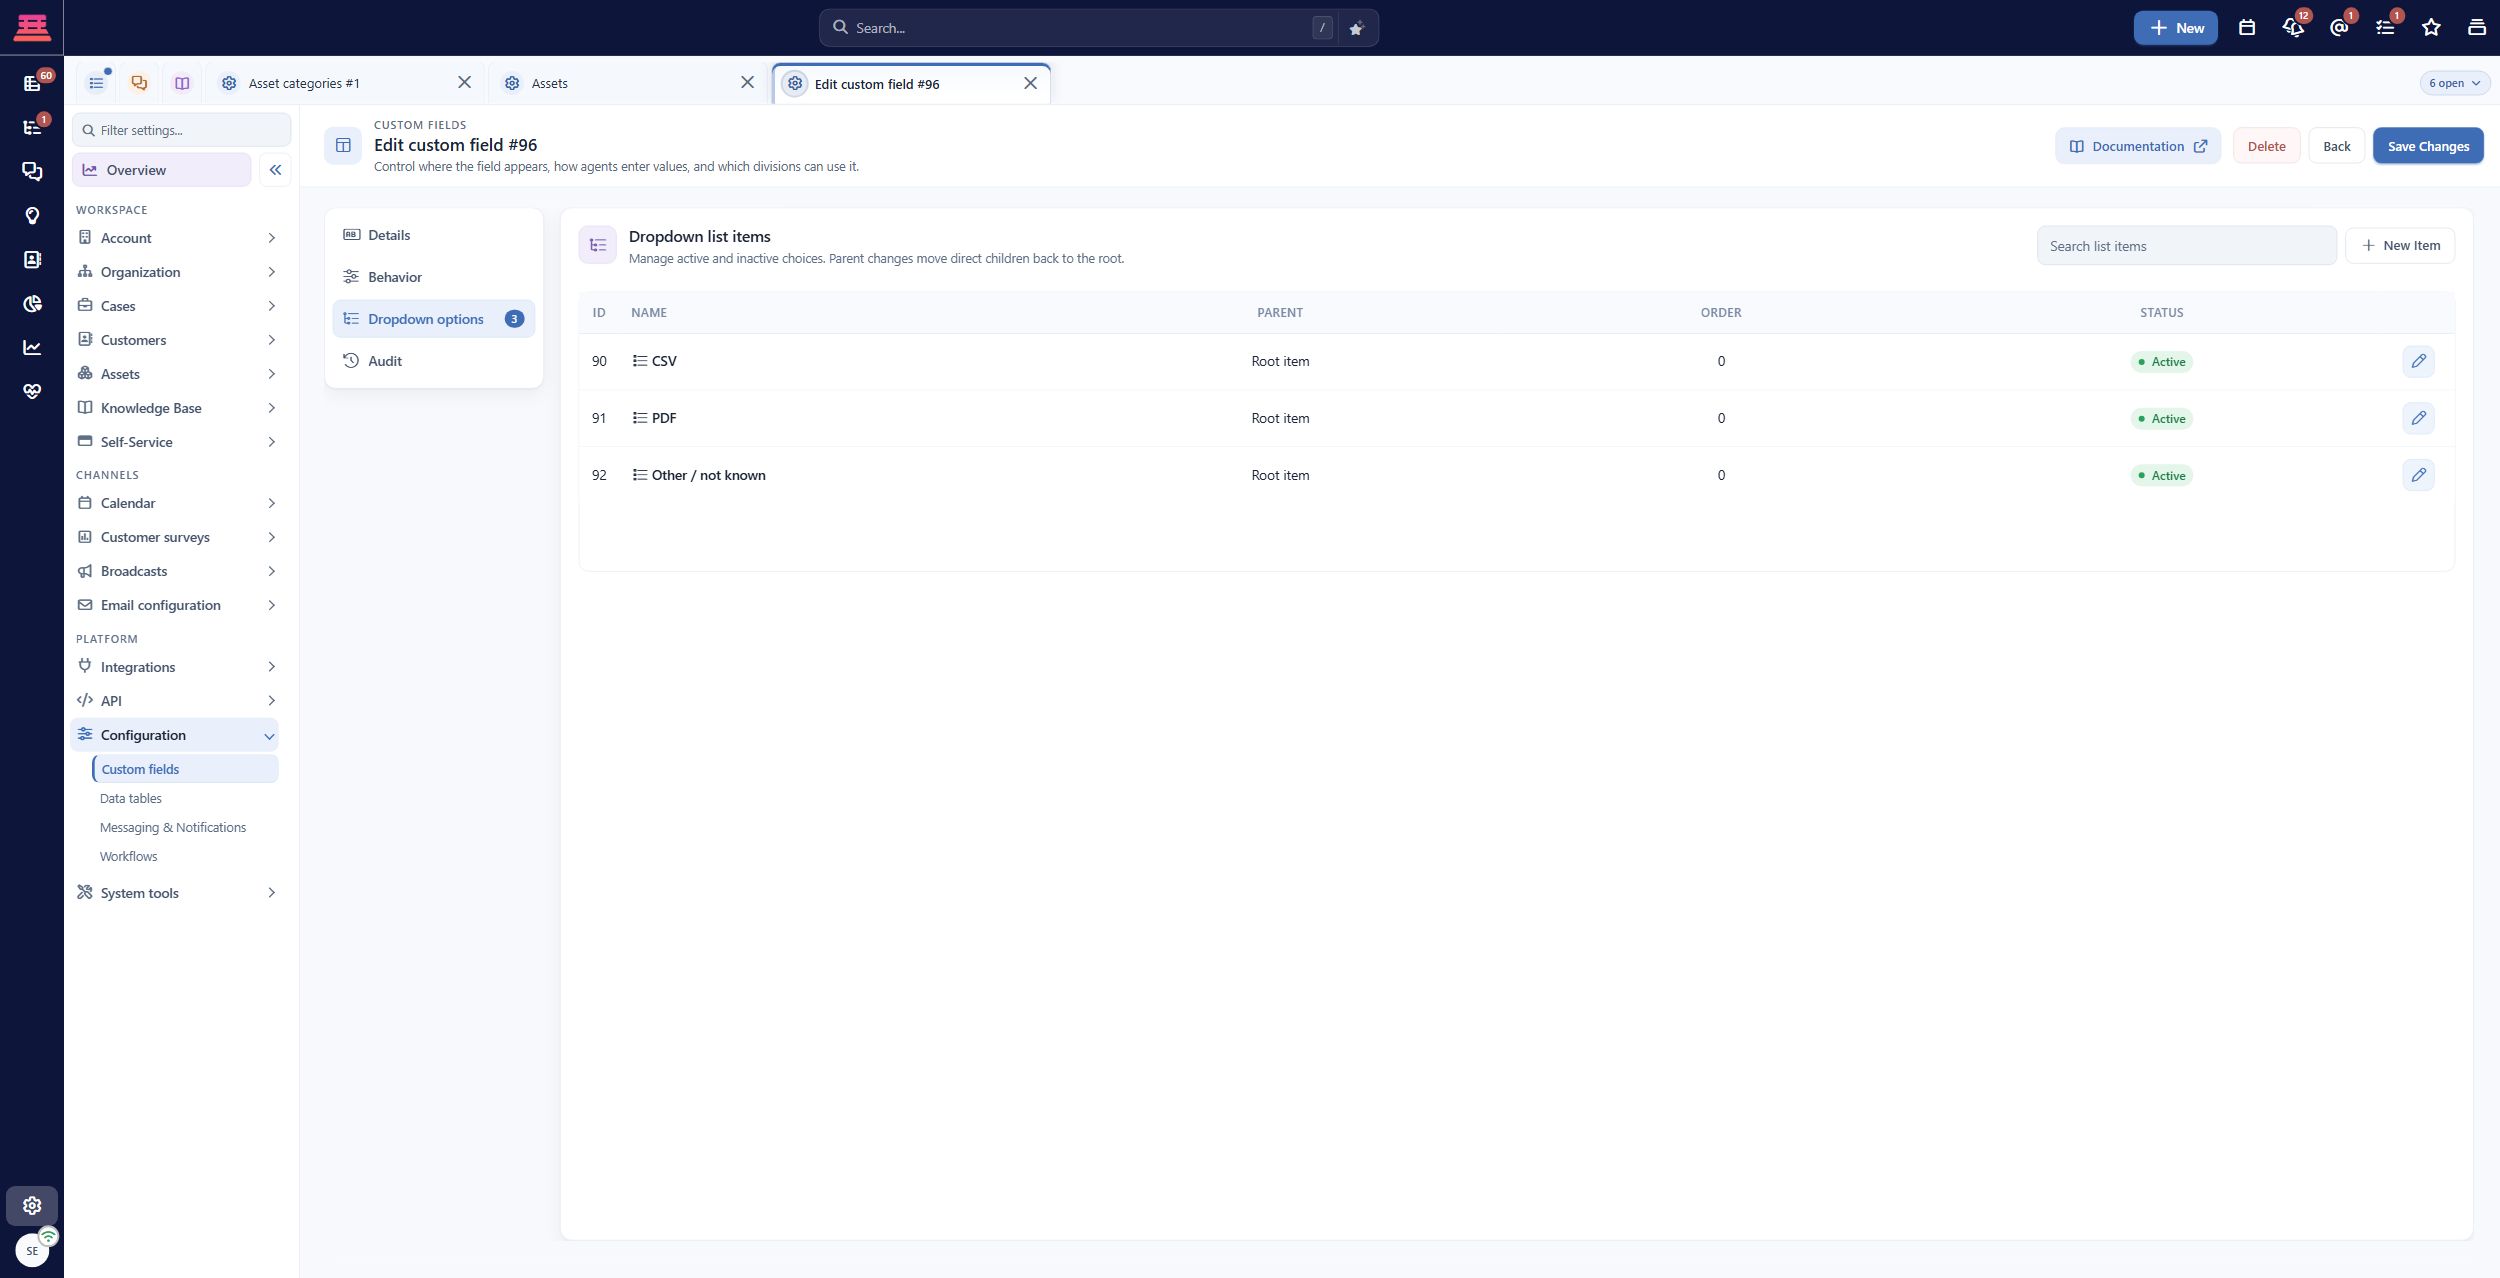
Saved Export format dropdown options: CSV, PDF and Other / not known. These values are fictional onboarding examples.
Custom-field configuration covers field-type variants; case policies explains placement and required fields.
Choose the right level of detail
A field is useful when someone will use its answer to route, investigate or report on work. Keep free-form investigation details in the activity body rather than forcing every detail into a new field.
Adding a case field does not automatically place it on every agent and portal form. Agent case-open, case-view, closure and customer forms can use different policies. Test each intended surface.
If the field does not work
- Absent from the form: check its entity/location and active state, then the matching policy’s Fields to Show and scope.
- Required validation appears but no field is visible: correct the policy so the field is shown, or remove the inappropriate requirement.
- Dropdown is empty: reopen the saved field and confirm that its items are active and saved.
- Wrong field type was chosen: stop before collecting more data. Review a replacement and any existing values; changing the type is not an automatic conversion.
- Agents cannot edit it: inspect the field behavior, their permissions and the specific record context.
Completion check
- Every added field has a purpose and an owner.
- Its record location and type are correct.
- Dropdown choices are saved and understandable.
- The intended case form displays and retains the example value.
- Portal placement is verified separately if required.
Previous: Assets and Asset Categories · Next: Case Policies
Updated 15 days ago