
Adding your Agents
Time to add your agents!!
Time to add your agents! We think this is the most exciting part:
We start to fill out the username (email), name, phone numbers associated with the agent, if any, and their usual working hours.
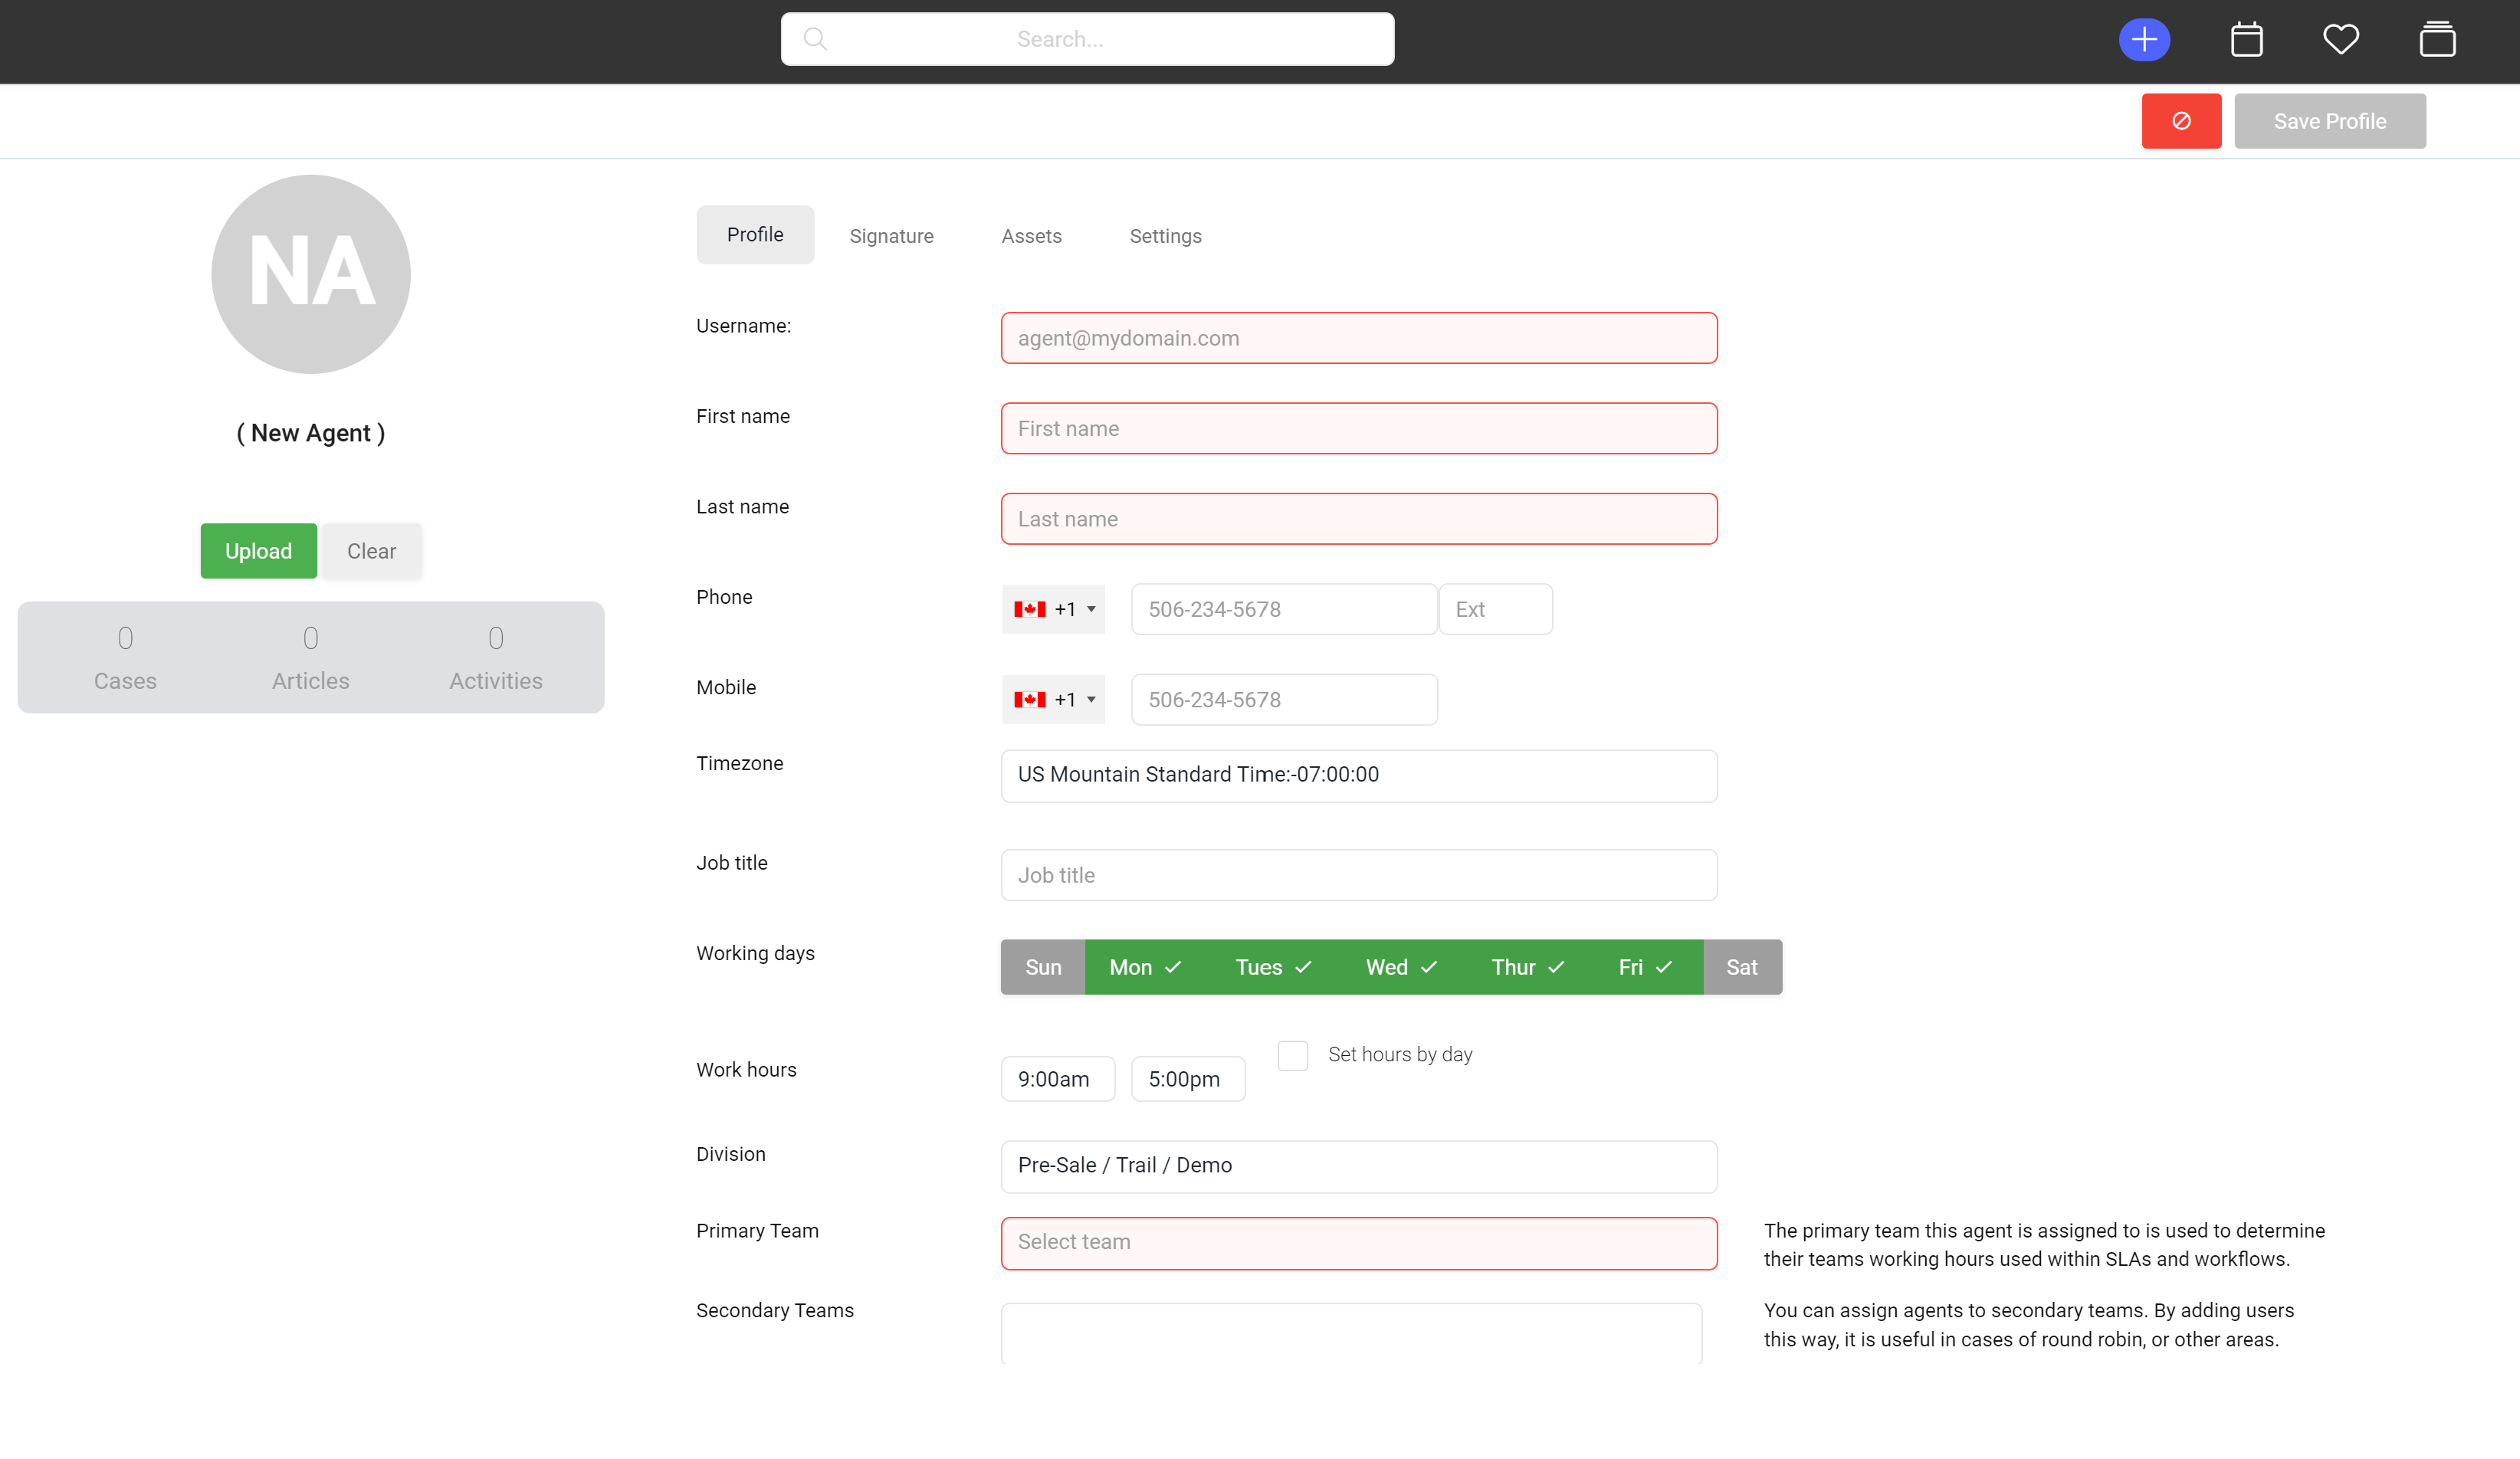
We then focus on their Division, Teams, Roles and the Work Queues (your agents will get notified about cases coming into the queues you assign here) you want this agent working out of. By setting these, we start to lock down what our agents can see in Supportbench.
Agents will not be able to see queues they or their teams are not assigned to. They will also not be able to see cases outside of the assigned division in their role. Roles take priority over profile settings.
If you want your agents to create their own signature, you can navigate to the "Signature tab", and de-select "Use system signature." Next, jump to the Assets tab and add any assets that will be associated with this agent.
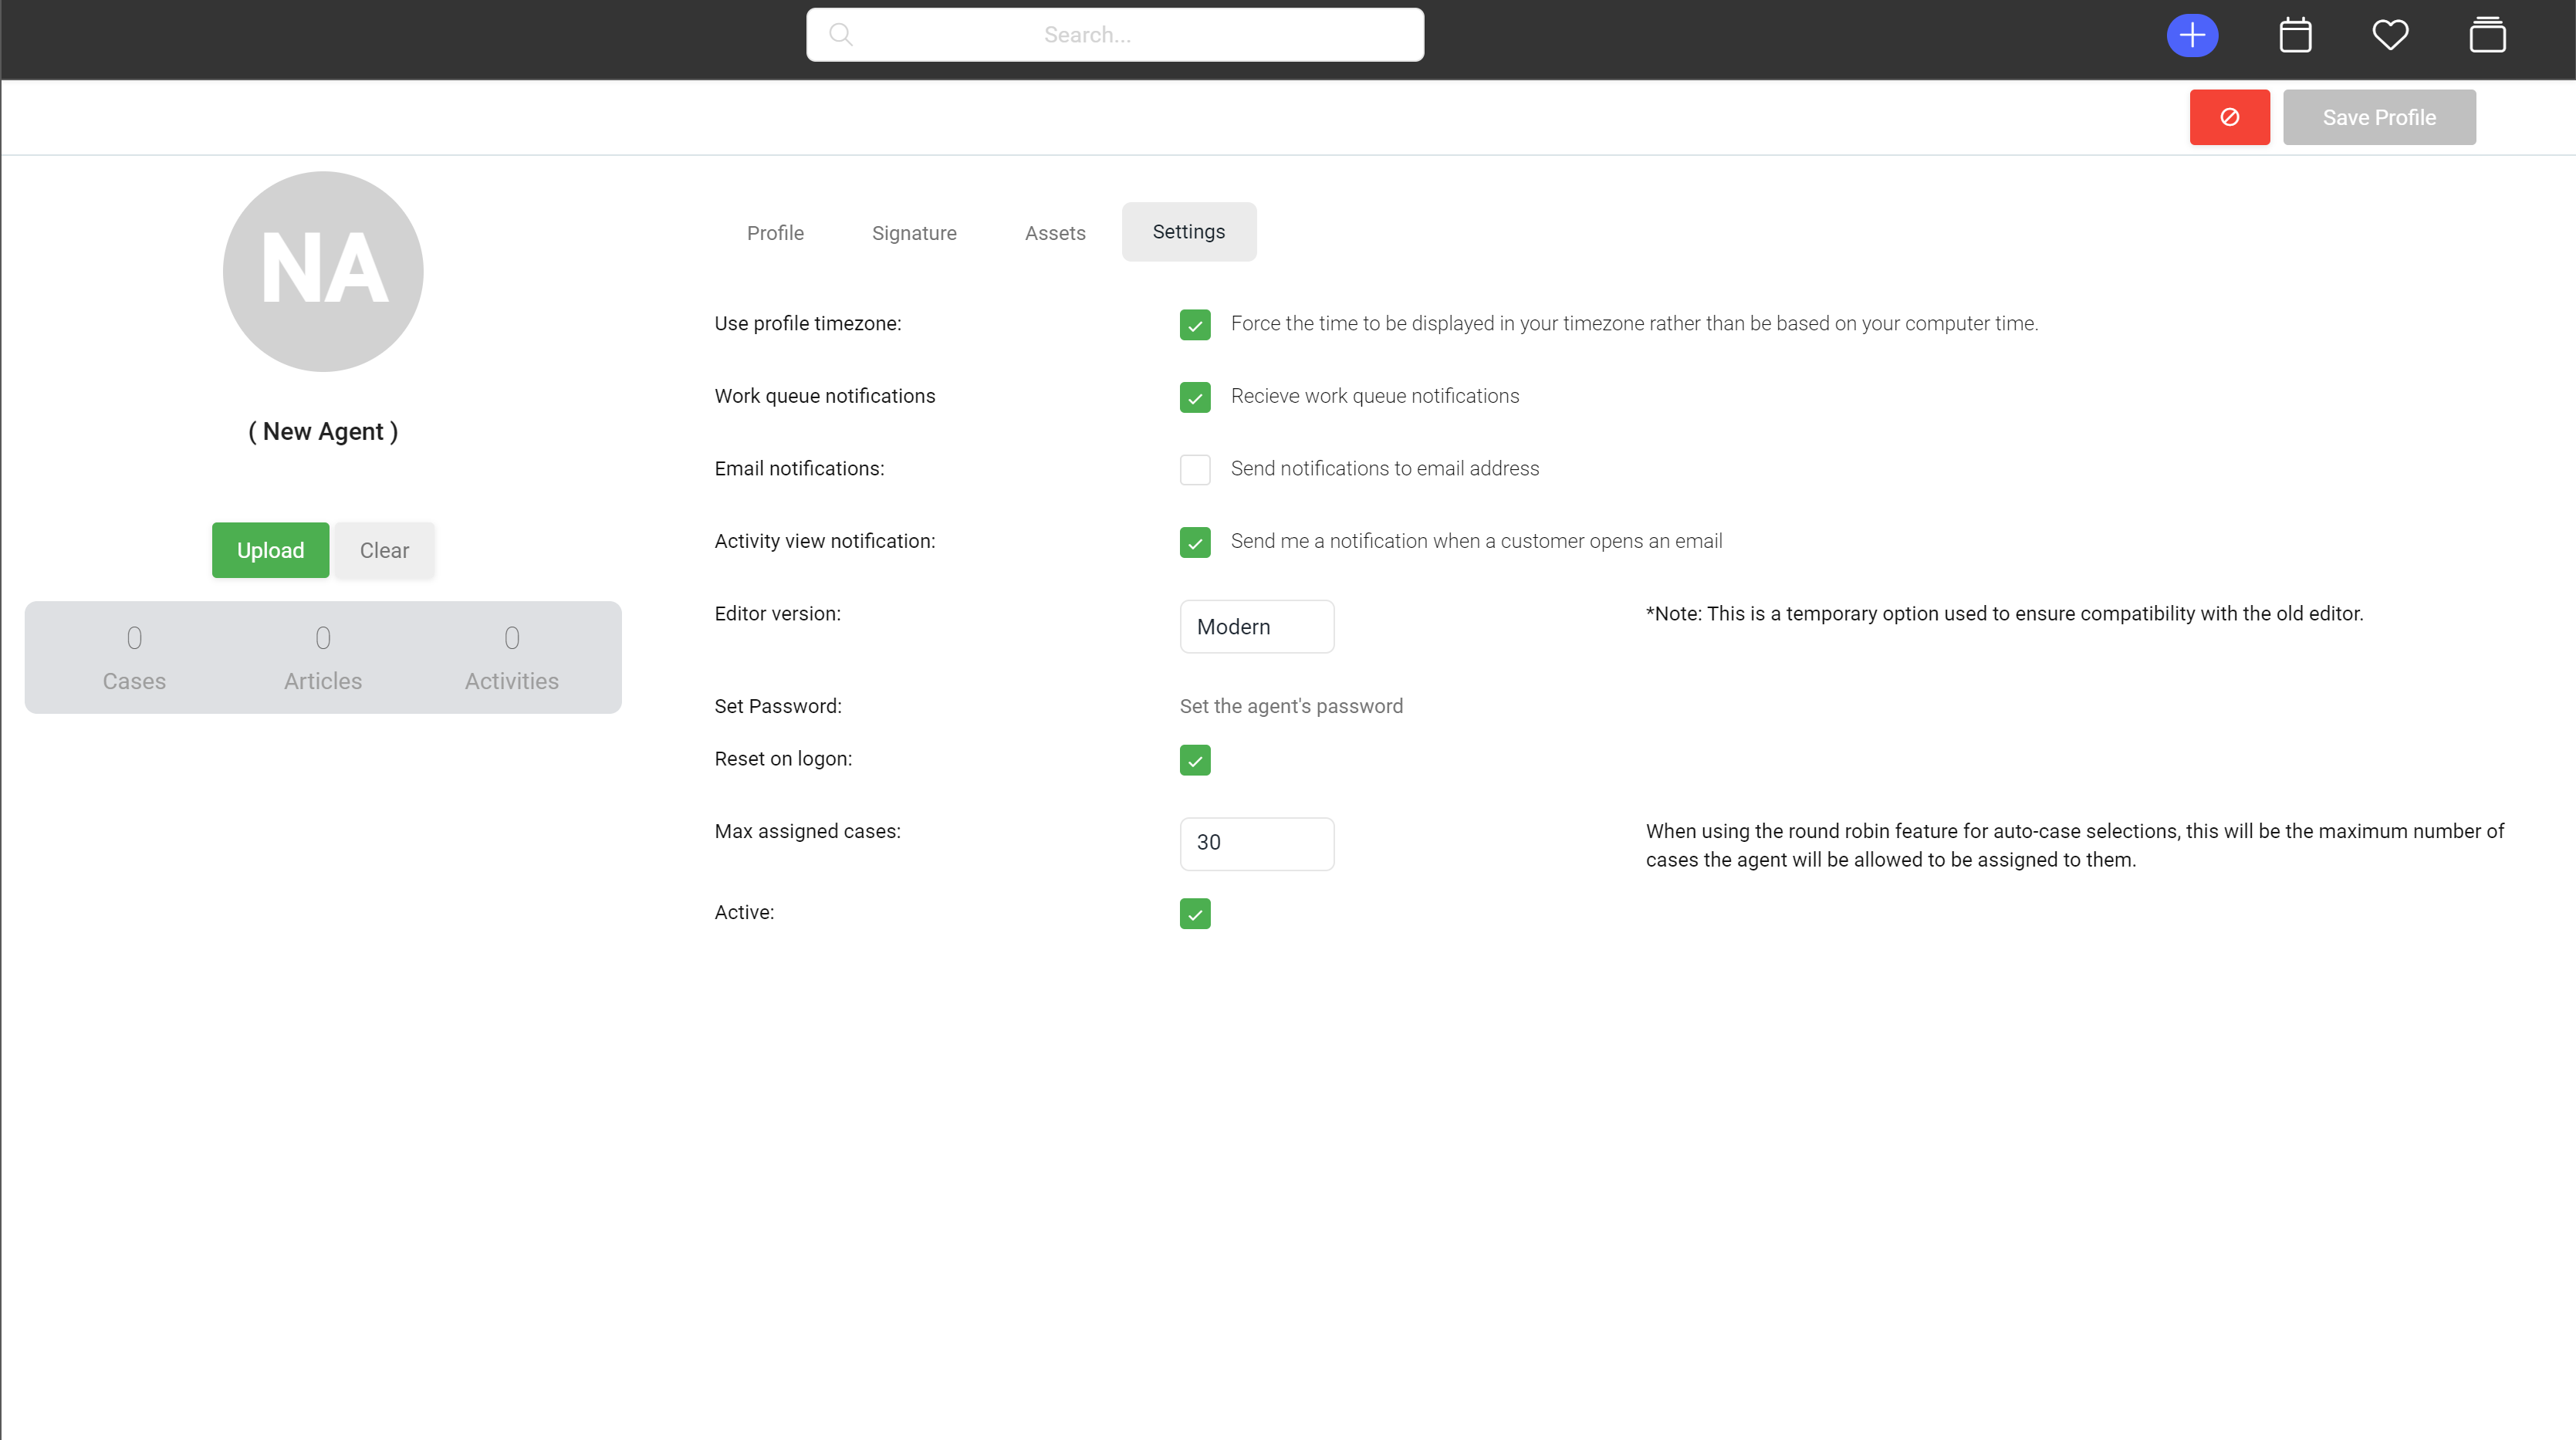
Now we can jump to Settings, and configure these parameters to meet your business requirements.
Step by step:
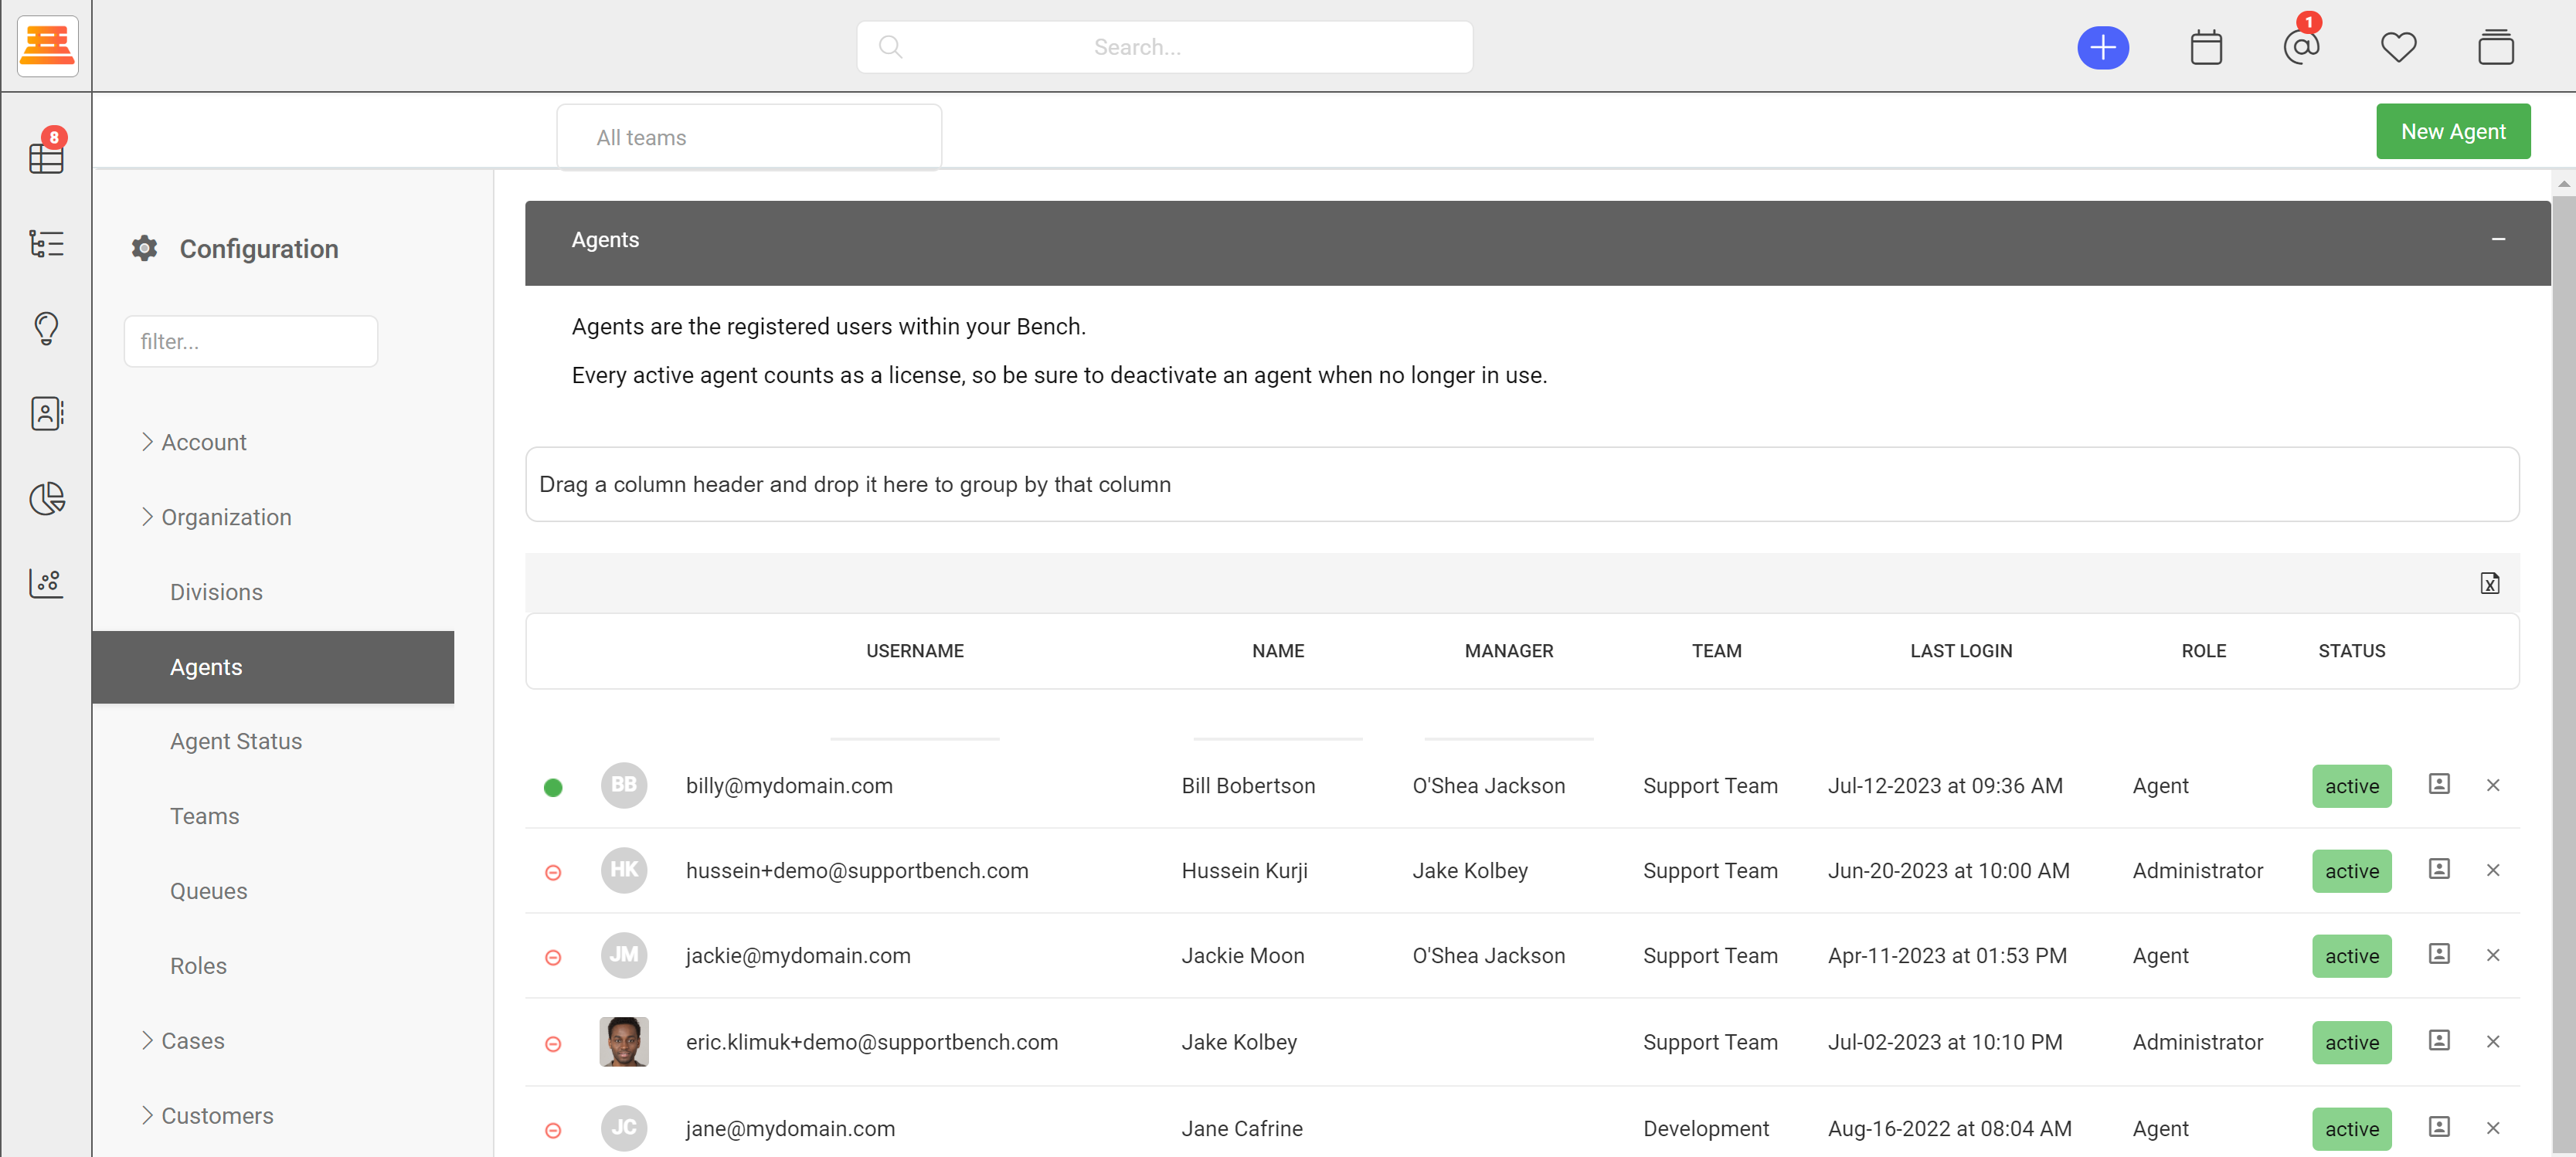
- Navigate to Configuration > Organization > Agents > New Agent
- Add the Agents Username (email,) first and last name.
- Choose the agents working days and hours
- Select the Agents division, and teams they will be apart of.
- Select the agents working Queues.
- Decide on if the agent will be using the default system signature
- Add any Assets the agent will be handling
- Decide on the agents settings (max # of cases, etc)
- Set the agents password manually or decide if they'll get a password reset email.
- Save Profile!
Congratulations, you've just added your first agent!
Updated about 1 year ago