
Community Portal
This is where we'll setup your first community portal, so that clients can begin to submit tickets and find the answers they're looking for themselves!
This is where we'll setup your Self service portal! Community portals in Supportbench are multi-tier:
They're your first line of support when dealing with customers. It allows them a place to view information on your products or services, creates a way to interact with other members, and allows them to submit and manage their cases.
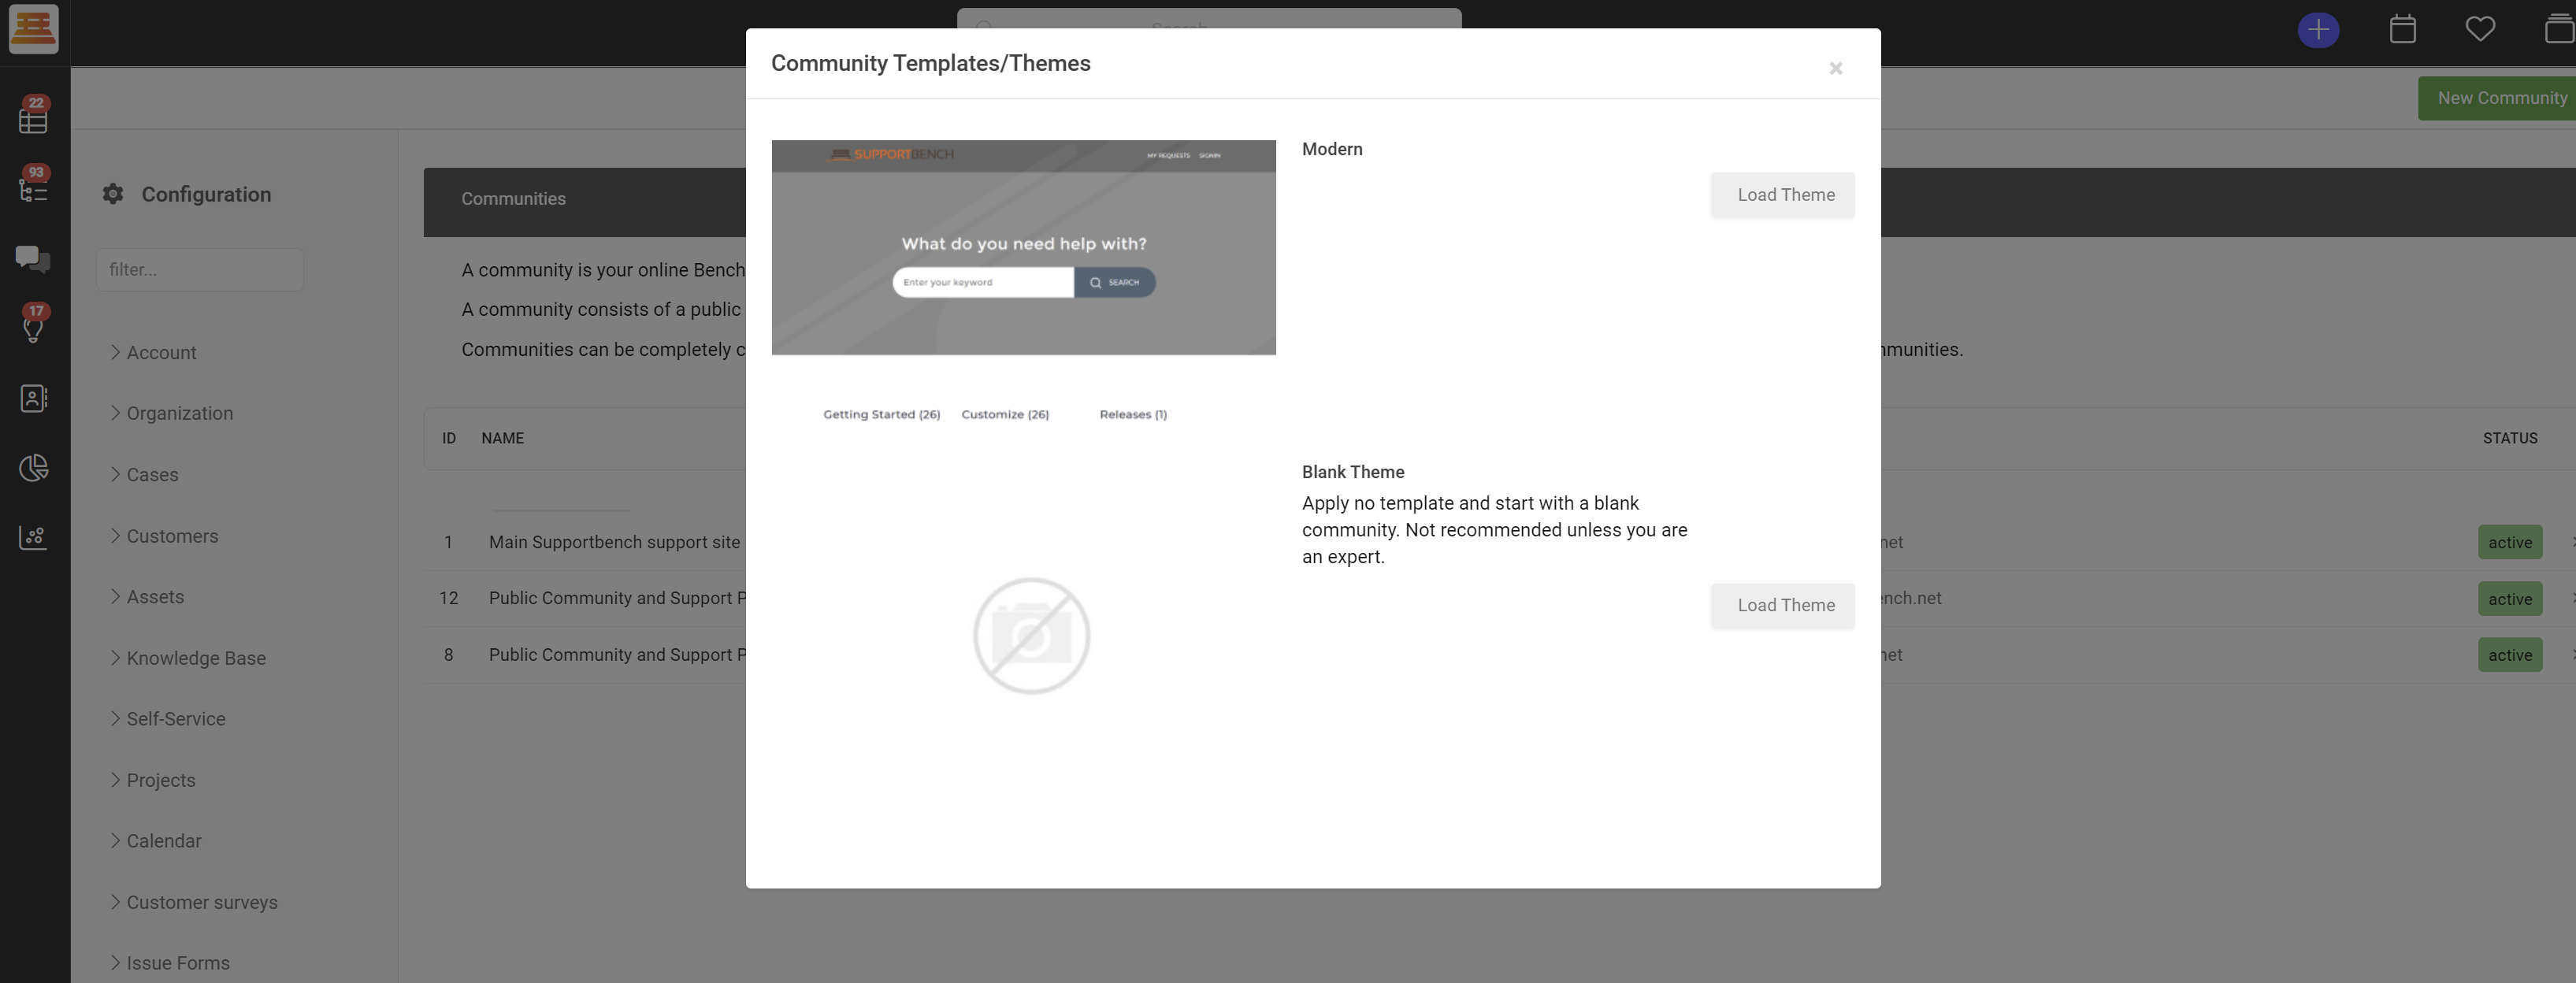
When you first create your portal, you'll be given the option to chose the Modern Portal Theme, or to create your own. For now, select the "Modern" theme, we can always update it later.
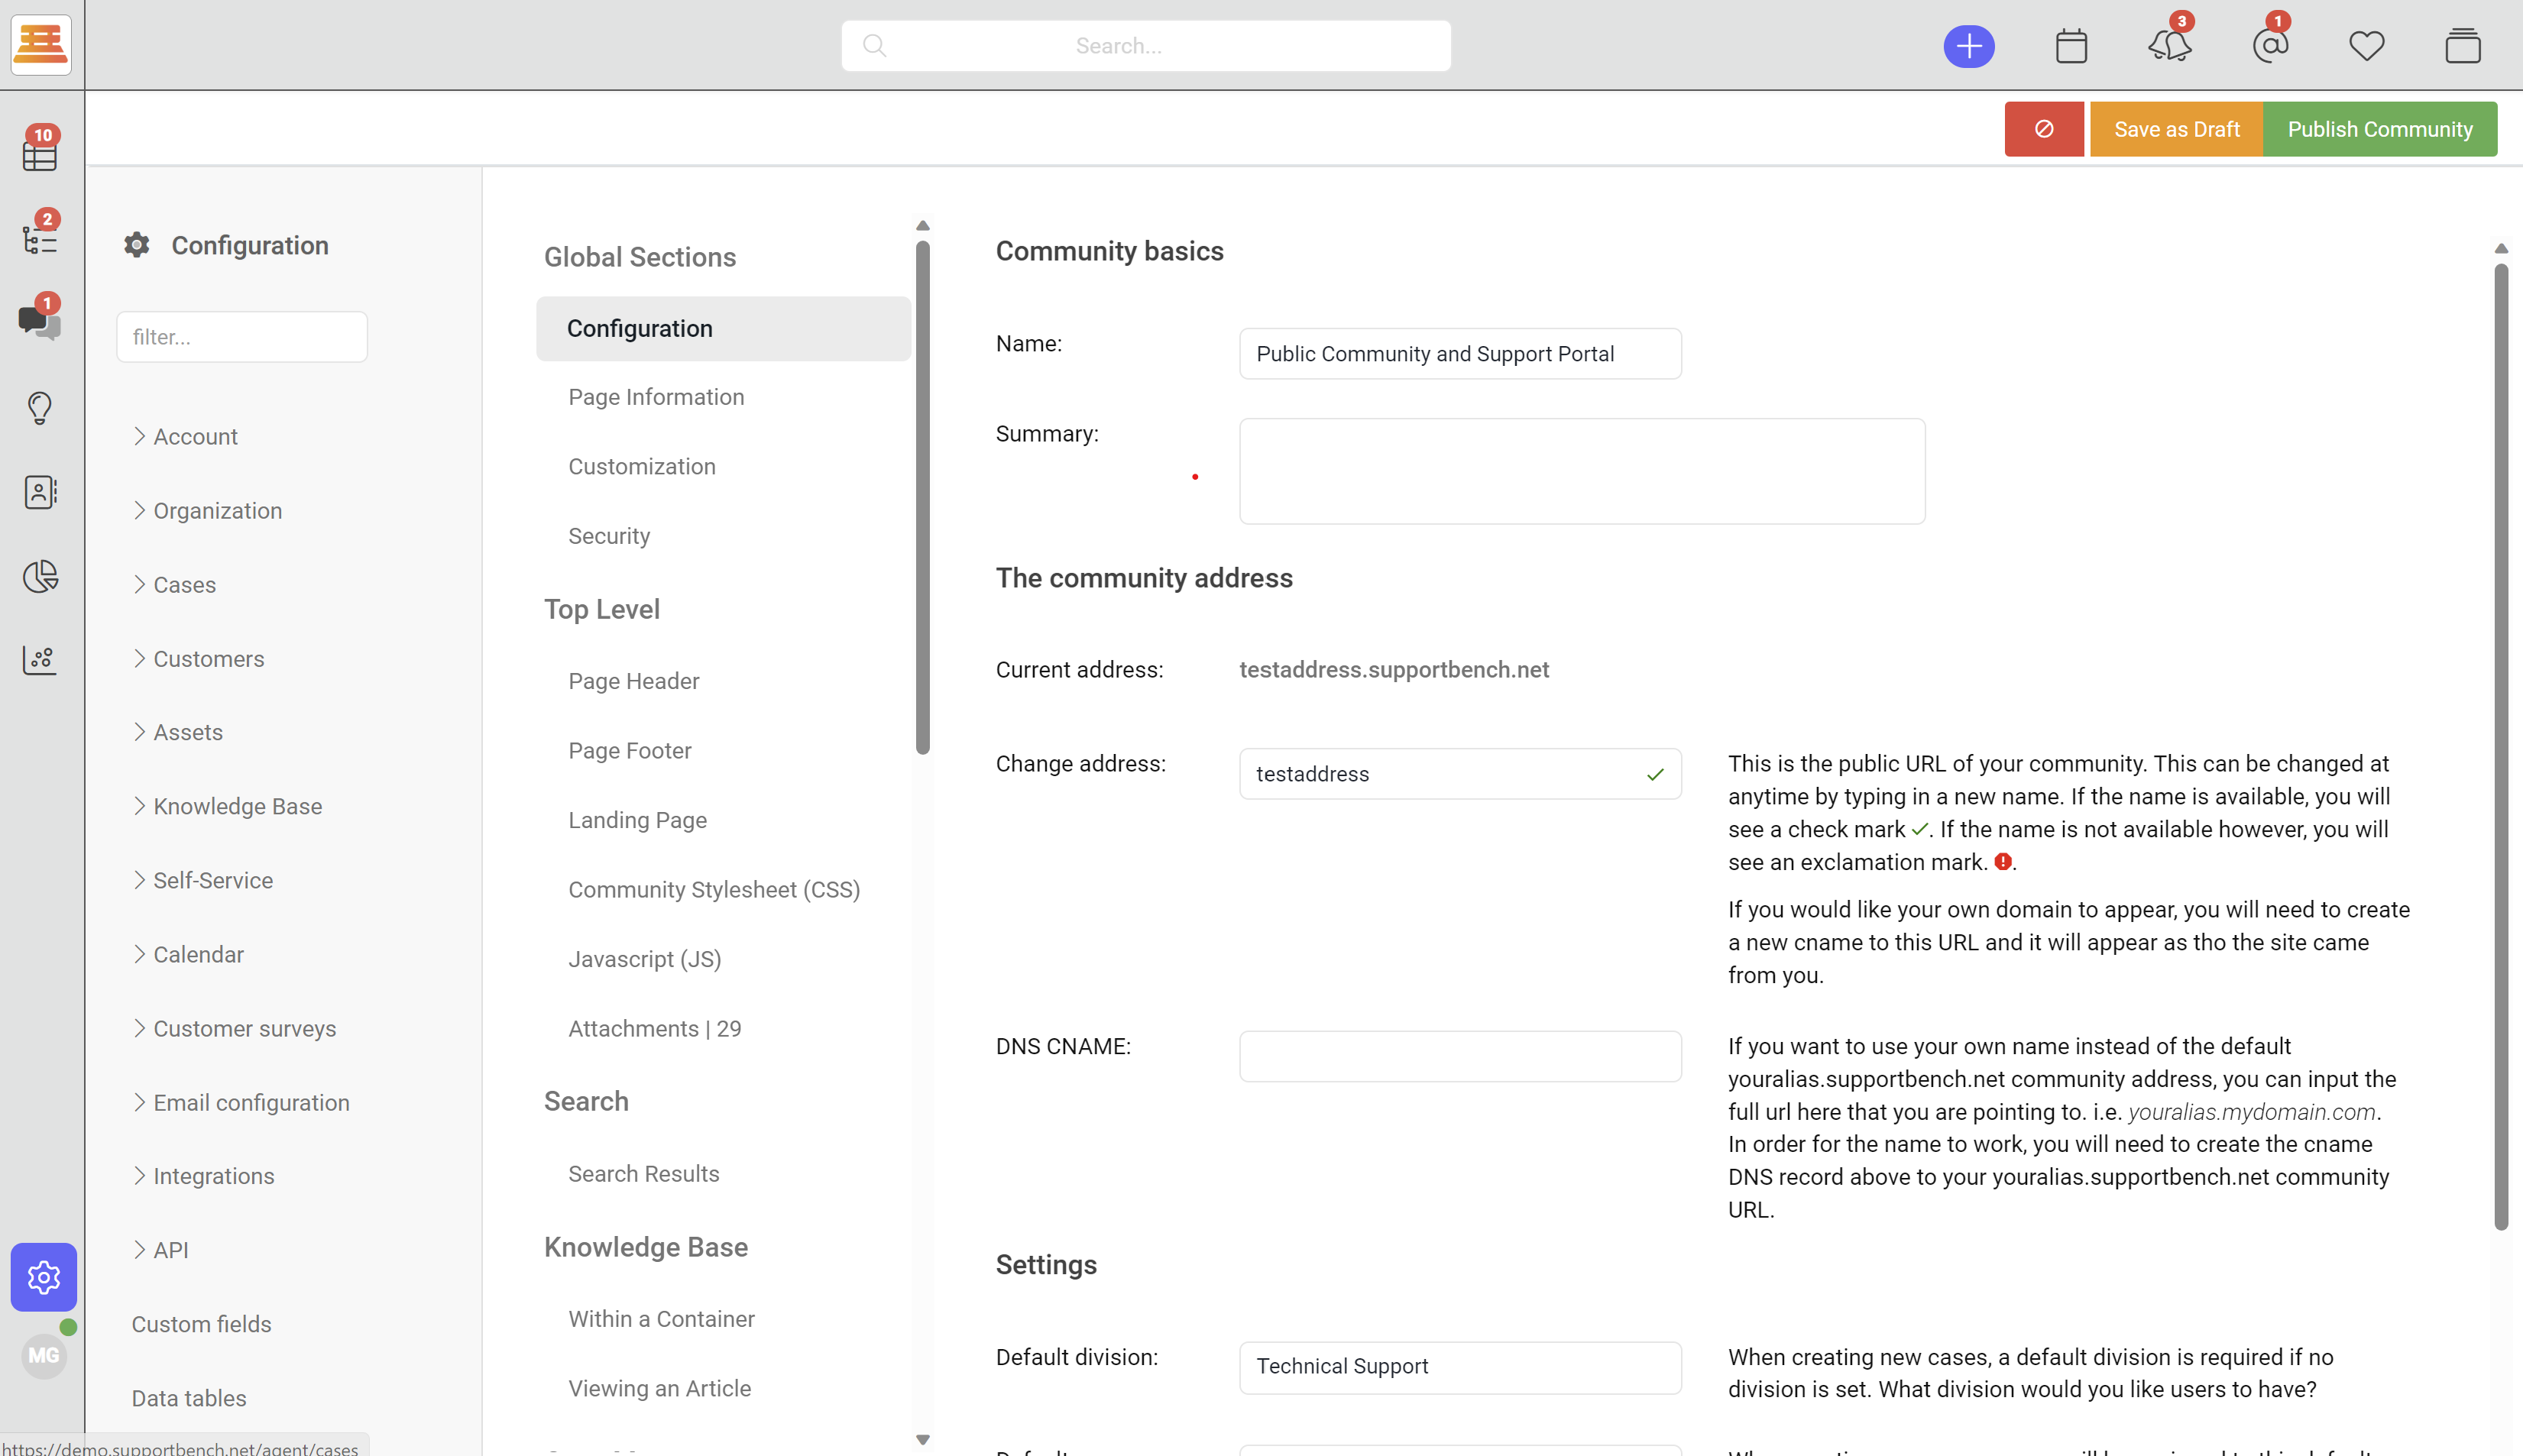
Once you enter your new Self service portal, you'll want to give it a friendly name and chose the URL that your clients will be navigating to in order to sign-in and submit tickets, or access your knowledgebase.
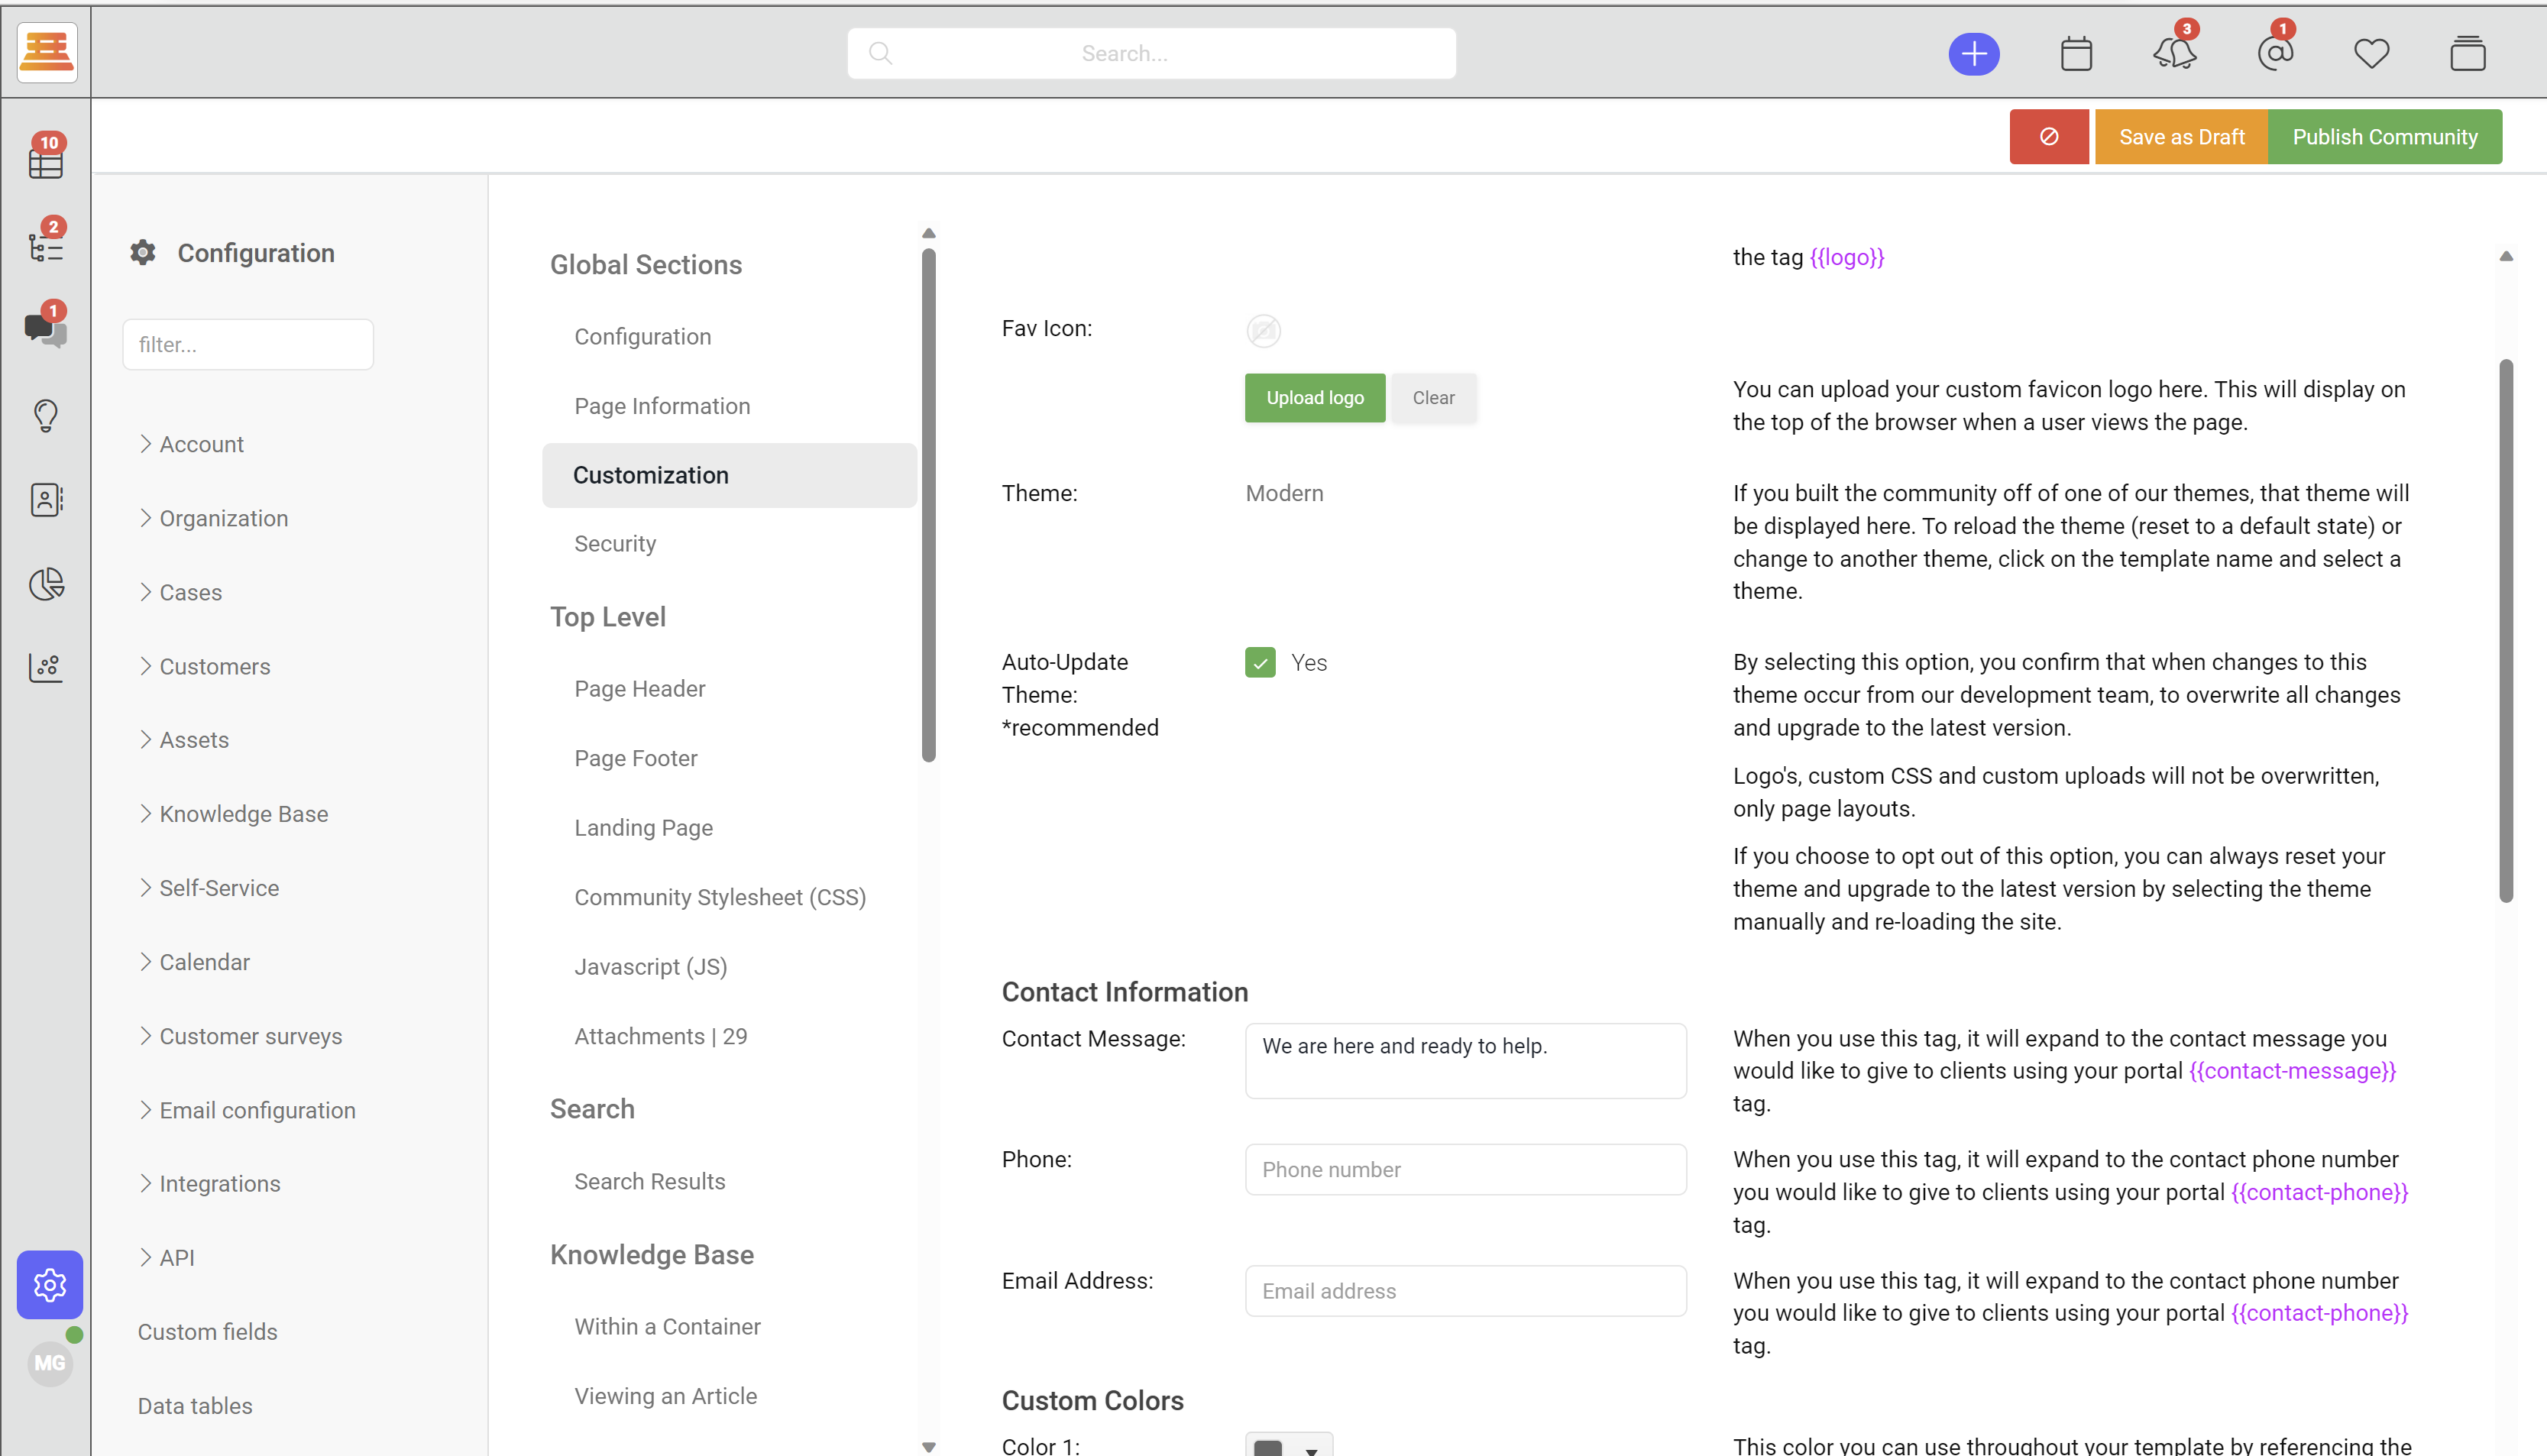
If you navigate to Page information you'll be able to add your meta tags and descriptions (great for SEOs.) Once you've finished that, navigate to customization and add your logos, colors and contact information.
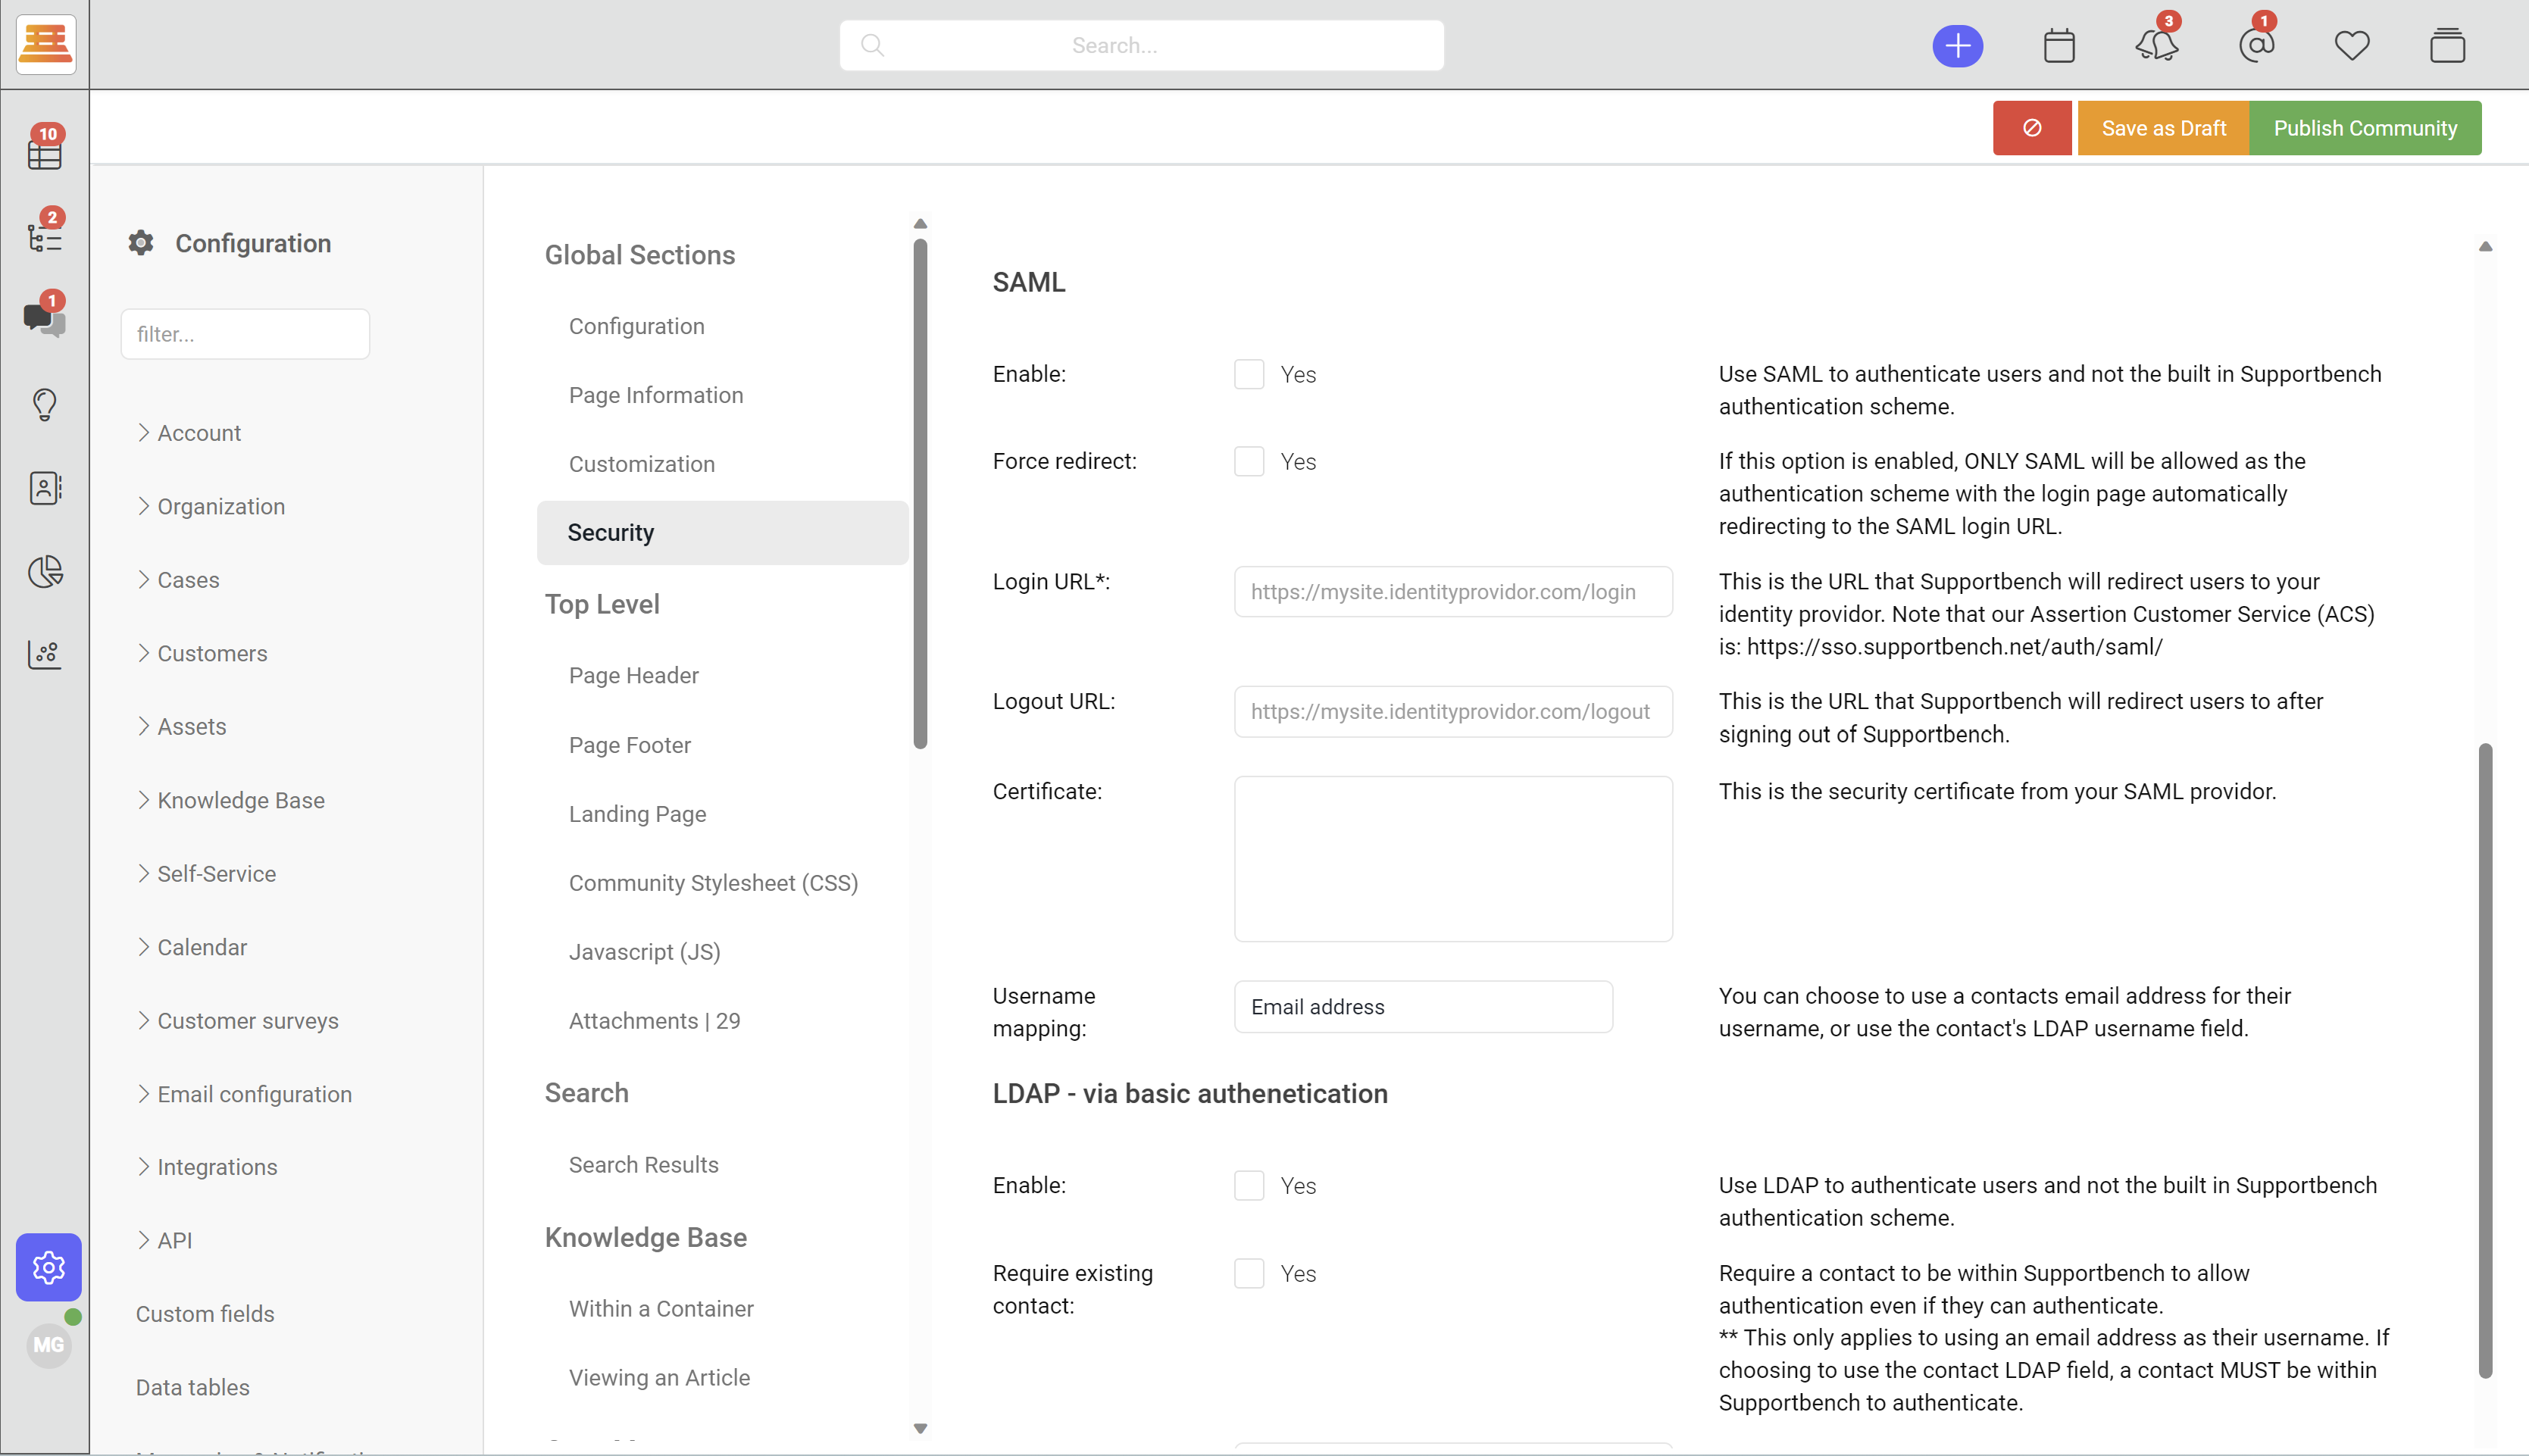
Now, we'll select the "Security" tab and decide on how we'll lock this Community down. Chose the Division, whether your containers will all be public, or if you want to reserve the ability to make some containers public. Note that Containers are what hold your articles. For example: A support container can hold articles related to DNS troubleshooting, etc.
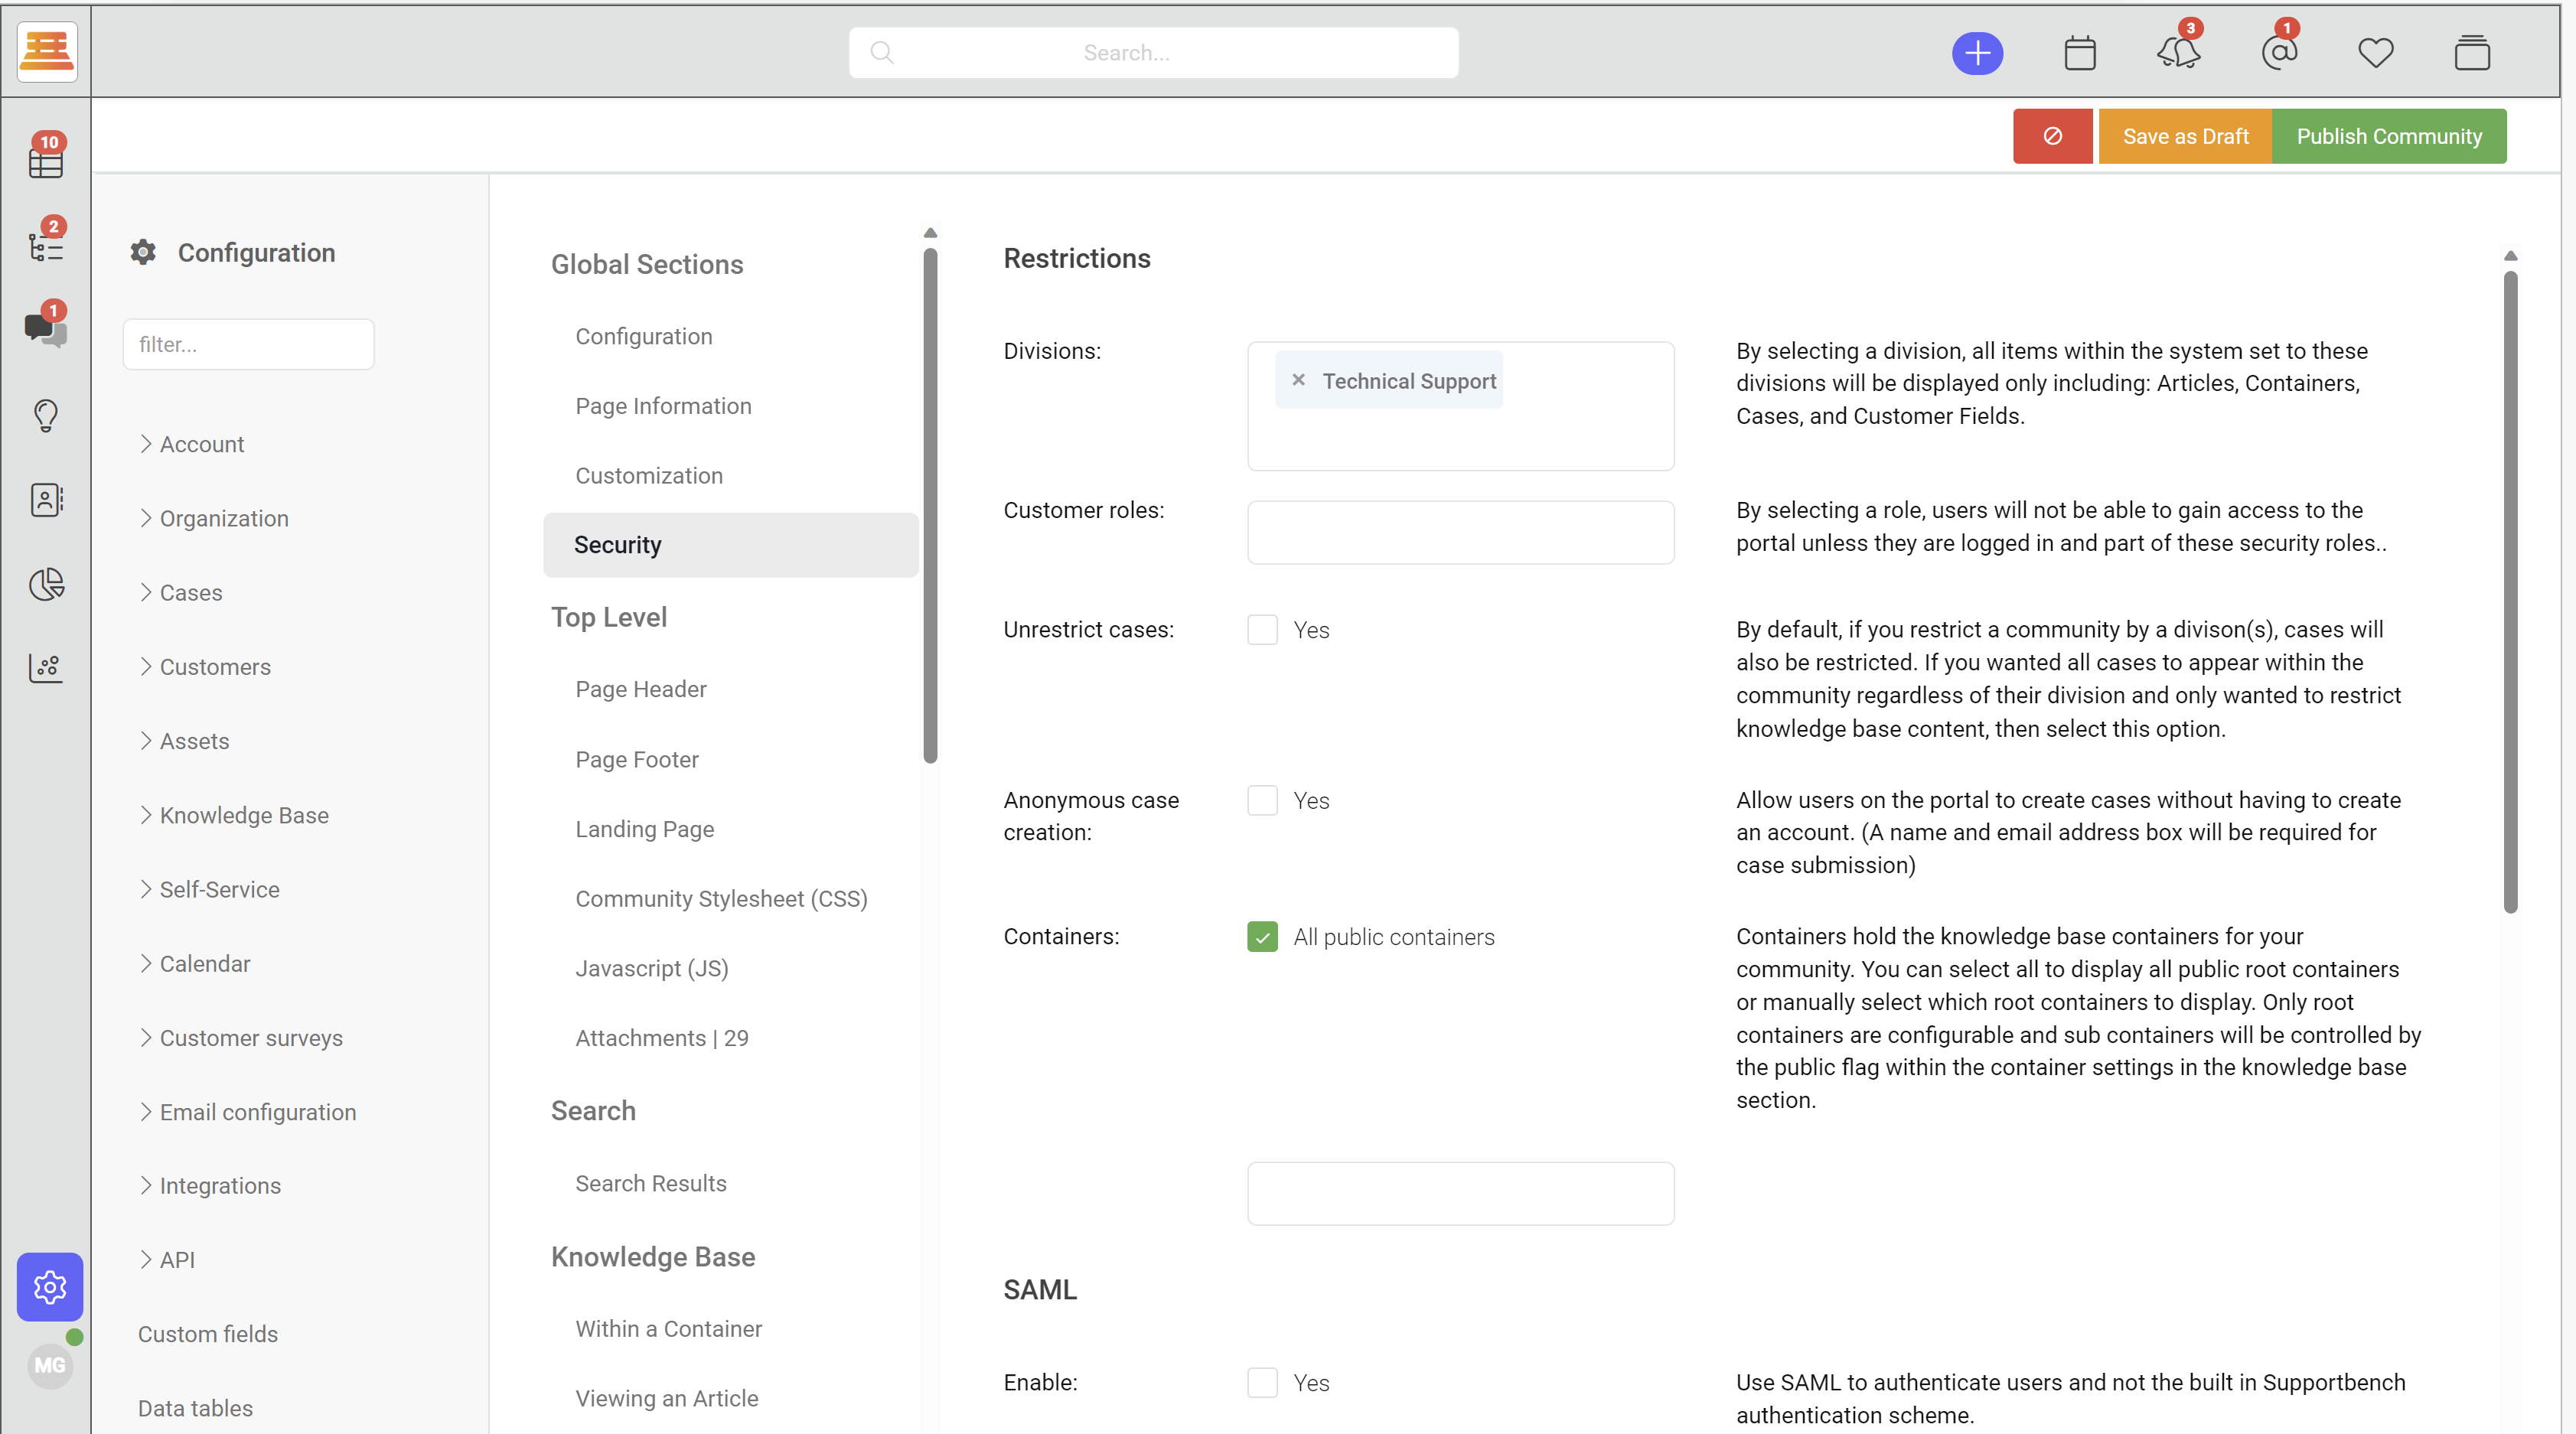
Afterward, you can decide wether you want to use SAML or LDAP authentication protocols (please contact Supportbench support if you need help setting these up!)
Next, its important to decide on what your clients will see when they submit a ticket. To decide on this, you will have to navigate to Configuration > Cases > Policy > New Policy
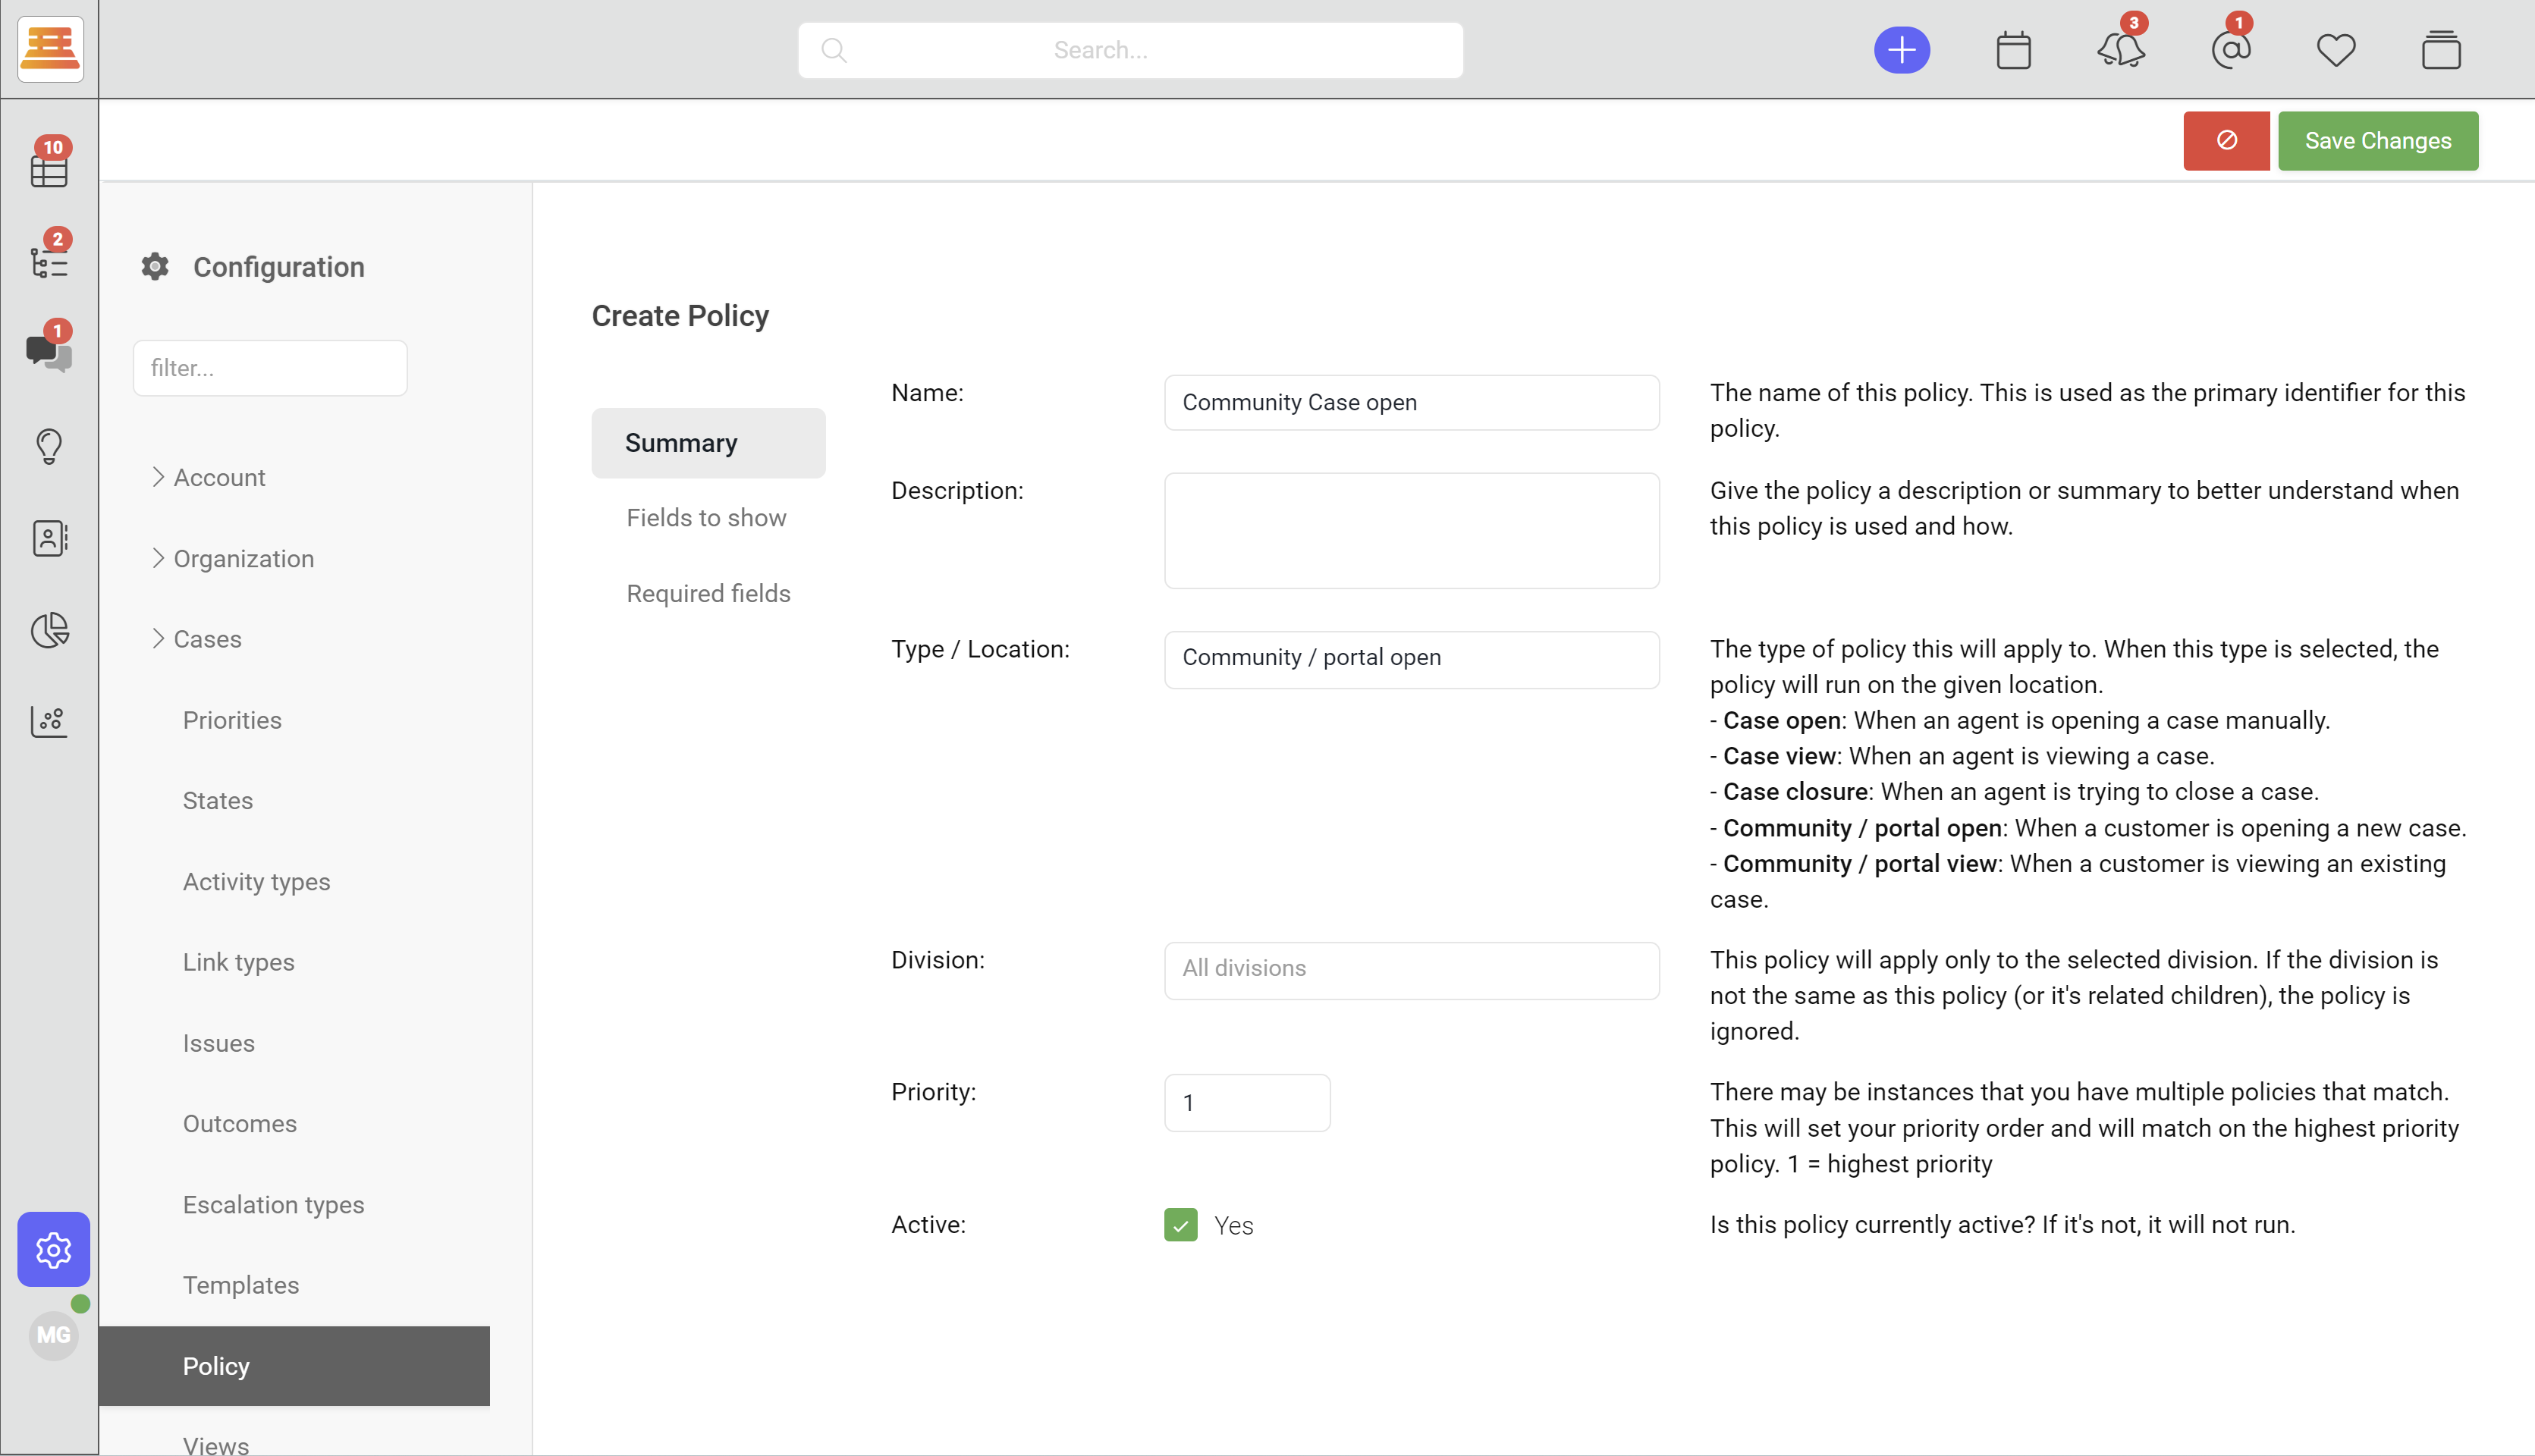
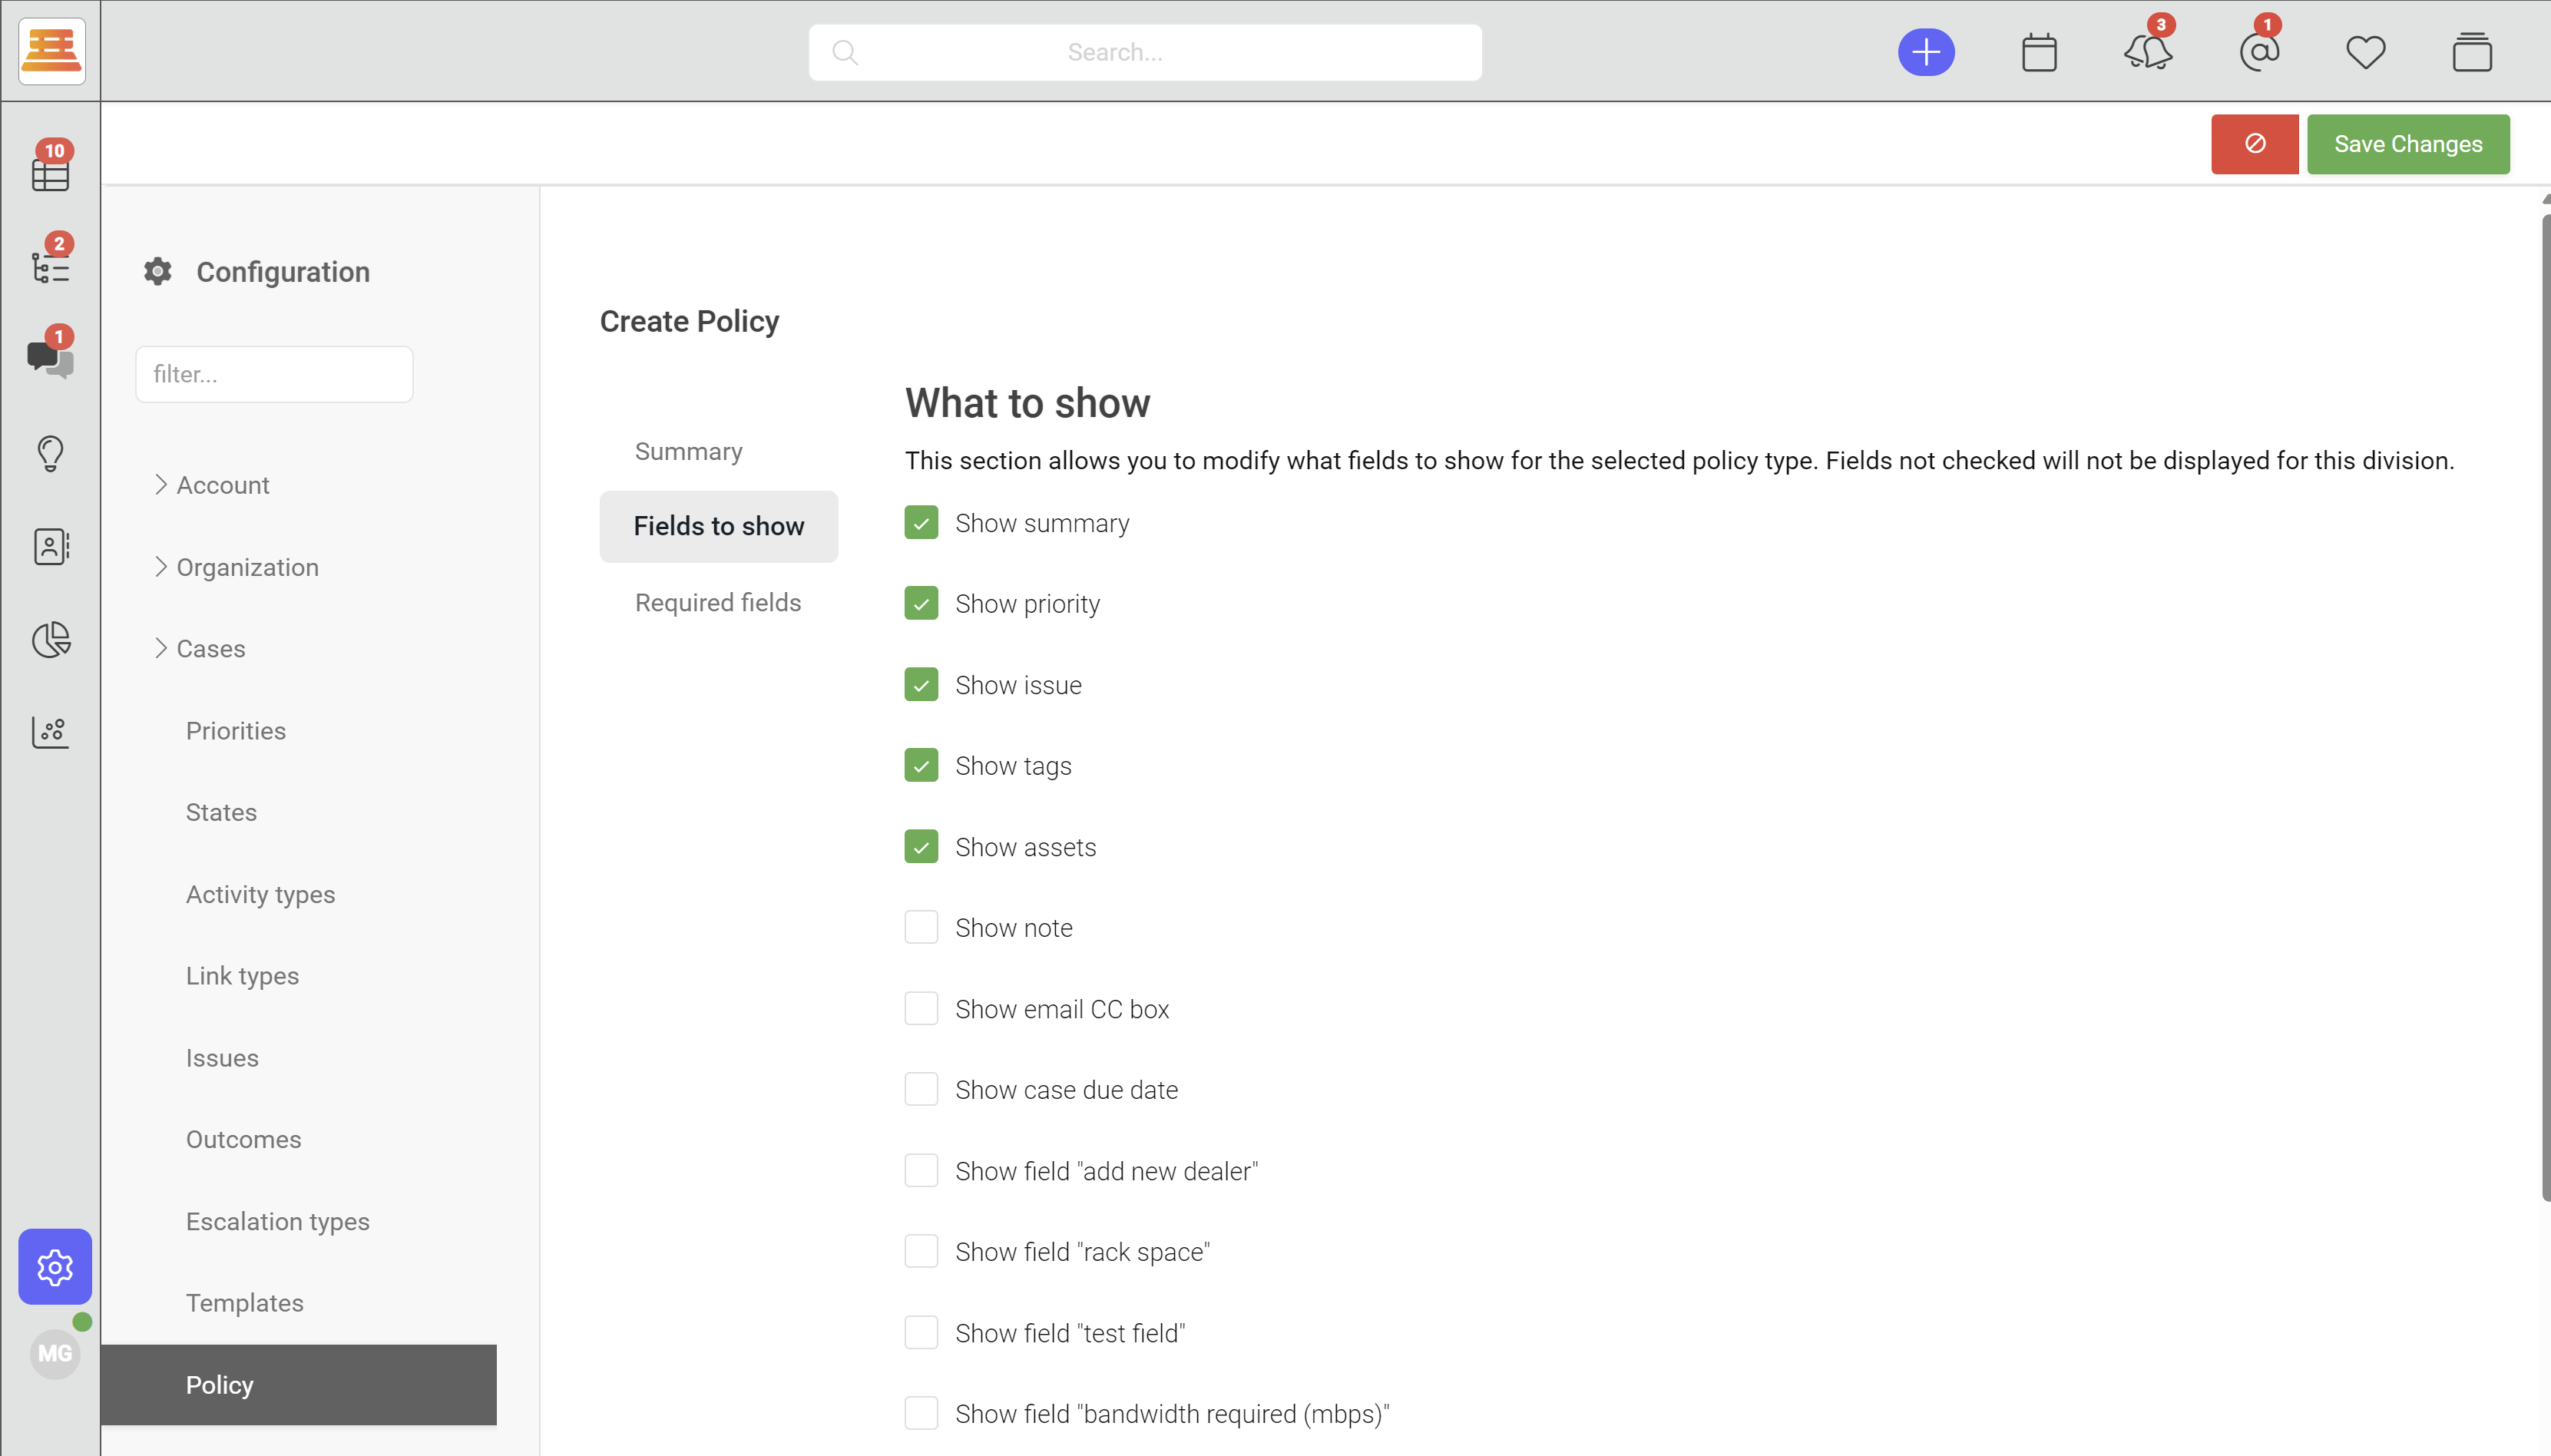
When you enter into the new policy, give it a name and select "Community / portal open" for the "Type / Location" field. After you've done that - navigate to "Fields to show" and select any fields that you want your clients to be able to see and fill out.
Next, Navigate to "Required Fields" and select any fields that are required for your clients to submit a case. This is necessary information that you'll need in order to help the client to the best of your ability.
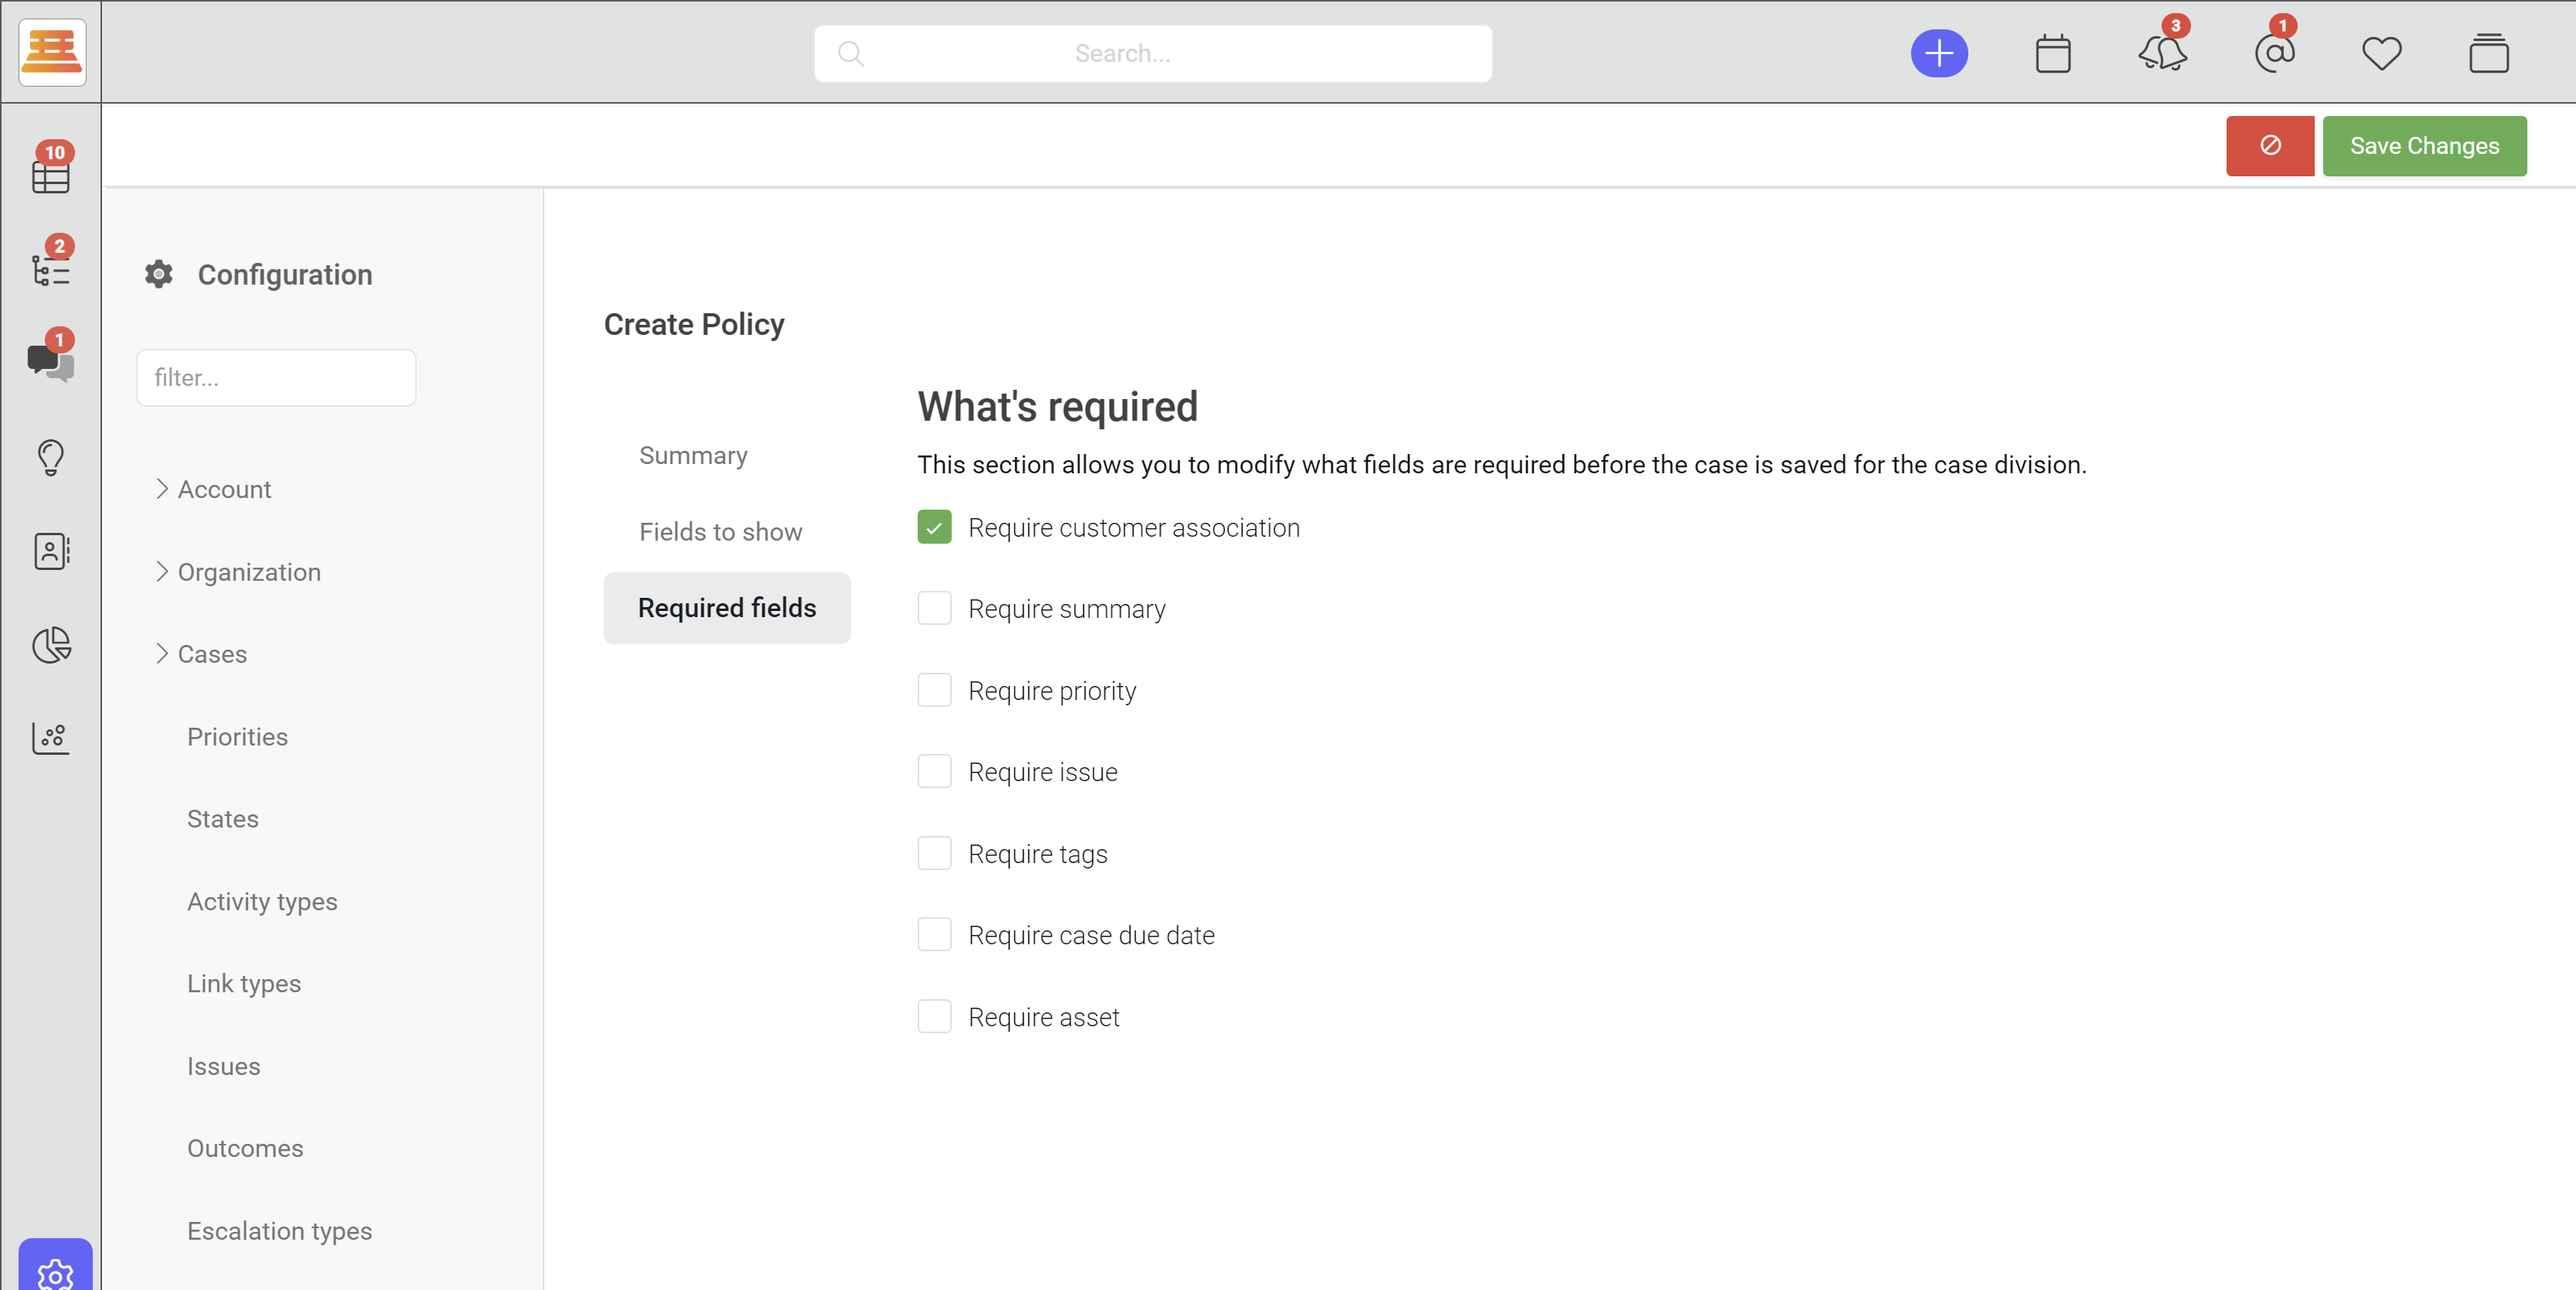
After you've decided on your required fields, hit save!
Here are some important, configurable sections within your self-service portal:
Page header
The page header is where your main navigation goes. This includes things like your logo, links to your other sites, and a login / logout button. The header page will always be displayed on all of the other pages.
Sign in
This is the main sign in / sign up page. Users can login from this page to access their cases, submit new cases, and access restricted forum content.
Landing page
The landing page is the fist page that is displayed when entering your community. You can use this as an introduction to your community, send them to different places or by default show all of the KB containers in the system.
Knowledge base
The knowledge base is where users can come and view all items of your knowledge base (Articles.)
Updated about 1 year ago