
Enabling Escalations
This is how we enable your escalations workflow.
Next, we’ll take a look at how we enable escalations. Use Escalations to get urgent cases where you want them to go.
First, lets navigate to Configuration > Workflow > New Workflow
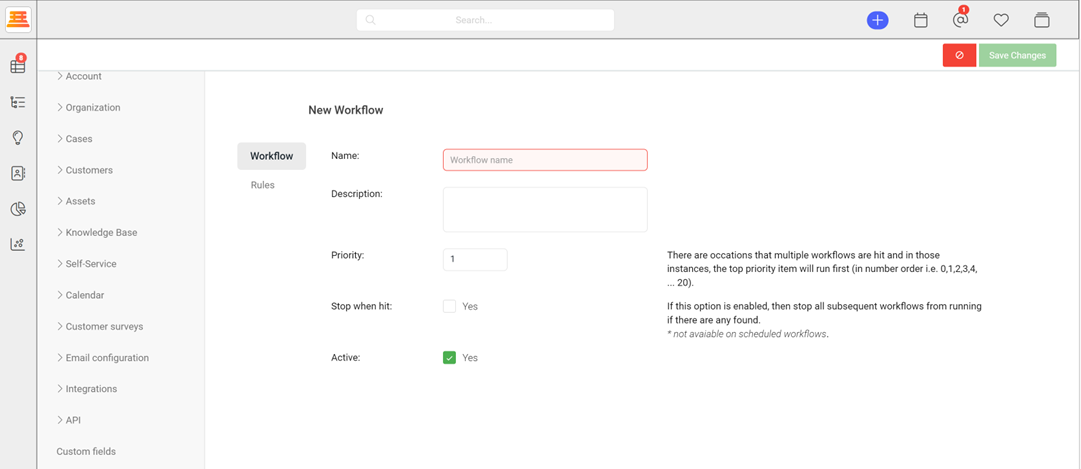
After entering the new workflow, you can proceed to give it a name, make sure its active and then head over to rules.
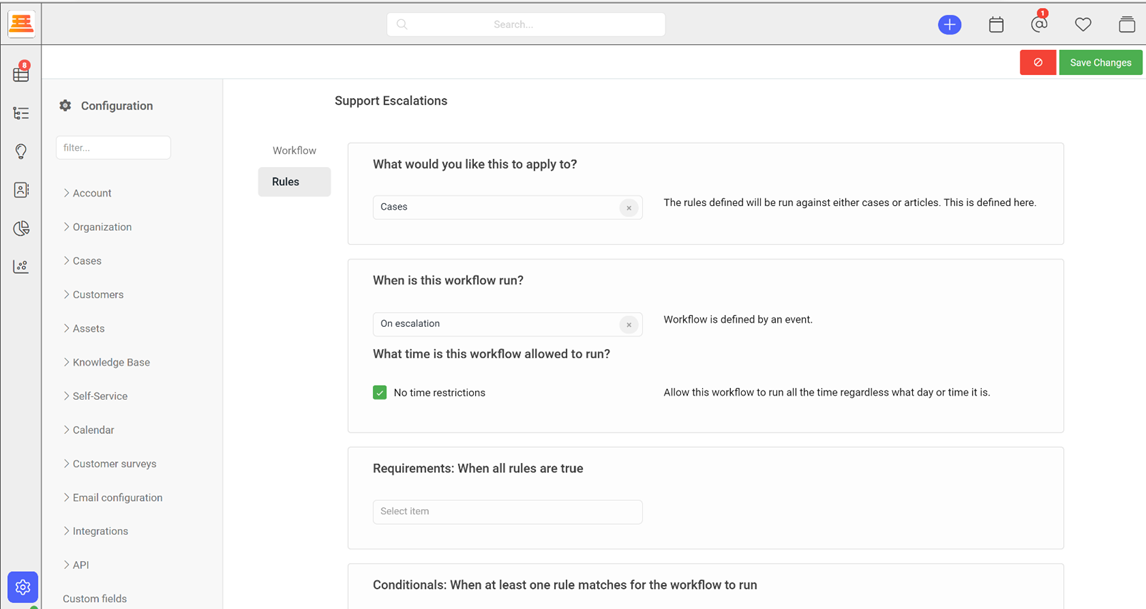
After navigating to the Rules tab make sure that the “What would you like this to apply to” dropdown is set to cases, then scroll to “when is this workflow run” And choose “On Escalation” then hit the “Save Changes” Button.
To test that your workflow is active and working, head over to your very first case and click over to the “Actions tab”
Step by step:
If your workflow worked, then you’ll see a big “Escalate” button.
- Navigate to Configuration > Workflows > New Workflow
- Give your workflow a name and navigate to Rules
- Make sure the workflow is running on cases
- Make sure the "When is this workflow run" dropdown is “On Escalations”
- Add any other rules you find necessary to direct escalated cases where you want them to go (escalations queue)
Updated about 1 year ago